 bluename
 How to Care for Cactus Seedlings in Their First Growth Stage
I still remember the first time I tried to grow cacti from seed. I was excited, hopeful, and honestly, a little naive. Within two weeks, most of my seedlings had collapsed into a mushy, translucent mess. It was heartbreaking. But that failure taught me more than any guide ever could. Now, after years of trial and error, I want to share exactly what I do to care for cactus seedlings in their first growth stage. If you are struggling with leggy, rotting, or slow-growing seedlings, you are not alone. Let me walk you through the steps that finally worked for me.
Why the First Growth Stage Is So Critical
Cactus seedlings are not miniature versions of adult cacti. They are fragile, vulnerable, and demand a different approach entirely. During the first few weeks after germination, they lack a fully developed root system and cuticle, which means they cannot tolerate direct sunlight, dry air, or fluctuating temperatures. In fact, according to the Royal Horticultural Society, seedling mortality rates in home environments can exceed 60% during the first month if conditions are not carefully managed. I learned this the hard way.
Step 1: Setting Up the Right Environment Before Germination
Before I even plant my seeds, I prepare a stable environment. This step is non-negotiable. I use a clear plastic propagation tray with a humidity dome. The dome keeps humidity above 80%, which mimics the natural conditions cactus seeds evolved under. I place the tray on a heat mat set to 75°F (24°C) during the day, dropping to 65°F (18°C) at night. The American Horticultural Society emphasizes that temperature fluctuations between day and night are critical for triggering strong root development. I learned that keeping temperatures constant actually weakens seedlings.
Selecting the Right Soil Mix
I make my own mix: one part coarse sand, one part perlite, and one part fine coco coir. Do not use standard potting soil. It retains too much moisture. The Royal Horticultural Society recommends a mix that drains within 30 seconds after watering. I test every batch. If it takes longer, I add more perlite. I sterilize the mix by baking it at 200°F for 30 minutes. This kills fungal spores that can cause damping-off disease, which killed my first batch.
The Sowing Technique That Saves Seedlings
I sow seeds on the surface. Cactus seeds need light to germinate. I barely press them into the soil. Then I mist the surface with a spray bottle until it is damp, not soaked. I cover the tray with the humidity dome and place it under a grow light set to 12 hours per day. The light is 6 inches above the dome. I never let the soil dry out during germination.
Week 1: The First 7 Days of Seedling Life
After about 5 days, I saw tiny green dots emerging. That was the moment I held my breath. During the first week, the seedlings are essentially water balloons. They have no root system to speak of. I mist the soil surface every morning. I do not water from below. Why? Because water pooling at the bottom can rot the emerging taproot. I learned this after losing a tray to what I thought was overwatering, but was actually poor drainage.
The Most Common Mistake I Made
I used to remove the humidity dome after germination. Big mistake. The seedlings need consistent moisture to develop their first true leaves, which are actually modified spines. Without the dome, the air dries out too fast. The seedlings stop growing and turn pale. I now keep the dome on for the entire first week. I only crack it open for 10 minutes each day to exchange air and prevent mold. I wipe condensation off the dome lid every two days to prevent dripping water from crushing tiny seedlings.
Lighting Adjustments I Had to Learn
Seedlings stretch if they do not get enough light. I learned to keep the grow light 4 inches above the dome after day 3. If I see any elongation, I lower the light by an inch. But I never go closer than 3 inches to avoid heat stress. The ideal light intensity is 2000 lux for the first week. I measured this with a cheap light meter. Anything less and the seedlings become weak.
Week 2: Gradual Hardening and My Observation Log
By day 8, my seedlings were about 0.2 inches tall. Some had tiny reddish tips, which I now know is a sign of healthy anthocyanin production, a natural sunscreen. At this point, I started the hardening process. I increased the air exchange by propping the dome open with a toothpick for two hours each day. I did this during the morning when temperatures were stable. I watched the seedlings closely. If they looked slightly wilted, I reduced the time.
The Watering Mistake That Almost Cost Me
On day 10, I watered from the bottom for the first time. I placed the tray in a shallow container of distilled water for 10 minutes. Two hours later, I noticed some seedlings leaning over. I panicked. I realized the soil had become too wet. I immediately removed the tray and placed it under a gentle fan on low speed for 30 minutes. The seedlings recovered by the next morning. I now bottom-water only when the top layer of soil is completely dry, which is every 4 days during week two. I never let water sit in the tray for more than 10 minutes.
Fertilizer: When and How I Introduce It
I started fertilizing on day 12. I use a liquid cactus fertilizer diluted to one-quarter strength. I apply it with a dropper directly to the soil, not the seedlings. The Royal Horticultural Society suggests that seedlings need nitrogen, phosphorus, and potassium in a 1-2-1 ratio during early growth. I mix 1 ml of fertilizer with 1 liter of water. I feed every 7 days. Overfertilizing causes salt buildup that burns the roots. I learned this when my seedlings developed brown tips after I doubled the dose.
Managing Pests Without Chemicals
On day 14, I spotted tiny white specks on the soil surface. Fungus gnats. They love moist soil. I immediately placed yellow sticky traps near the tray and reduced watering frequency. I also sprinkled a thin layer of diatomaceous earth on the soil surface. This is non-toxic and approved by the American Horticultural Society for organic pest control. Within 48 hours, the gnats were gone. I now inspect my seedlings every morning for any sign of pests.
Step 4: Common Problems I Faced and How I Solved Them
Damping-Off Disease
This is the number one killer of cactus seedlings. The stem becomes thin, dark, and the seedling falls over. It is caused by fungal infection from excessive moisture. I lost 40% of my first batch to this. I now use a hydrogen peroxide solution: one part 3% hydrogen peroxide mixed with three parts water. I spray the soil surface once a week during the first two weeks. This kills fungal spores without harming seedlings. I also improve air circulation by gently fanning the tray for 15 minutes twice a day.
Algae and Moss Growth
Green slime on the soil surface is a sign of too much moisture and insufficient light. I scrape the top layer of soil with a sterile fork and replace it with dry mix. Then I increase the light intensity by 500 lux. Algae typically disappears within three days. I also noticed that using clear pots encourages algae, so I switched to opaque pots.
Seedlings Turning Purple
Purple coloration in seedlings is often a response to high light stress or cold temperatures. I check my heat mat. If the soil temperature drops below 60°F, the seedlings produce purple pigments. I raised the mat temperature to 70°F, and the purple faded within two days. If the problem is light stress, I raise the grow light by one inch.
Step 5: When to Transplant Seedlings
I do not transplant before the seedlings have at least two sets of true spines. This usually happens around week 6 to 8. But if your seedlings are growing in a cramped tray, they may need more space earlier. I look for roots emerging from the drainage holes. If I see that, I transplant immediately. I use a similar soil mix but with larger perlite particles for better aeration. I water sparingly for the first week after transplanting to allow roots to heal. The American Horticultural Society recommends waiting 10 days before first watering after transplant.
How I Increase Light Gradually
After week two, I start moving the tray out from under the dome for longer periods. I begin with 30 minutes of direct grow light exposure without the dome. I increase by 15 minutes each day. By day 21, my seedlings are fully exposed to the grow light for 12 hours without a dome. I monitor for signs of sunburn, which appears as white or yellow patches. If I see any, I reduce light exposure for two days.
Expert Insights Supporting My Approach
I consulted multiple sources to refine my technique. The Royal Horticultural Society emphasizes that "cactus seedlings require a balanced approach to moisture and light, with gradual transitions to reduce shock." Their research shows that seedlings exposed to high humidity for the first 10 days have 85% higher survival rates. The American Horticultural Society adds that "soil sterilization is the single most effective preventive measure against seedling diseases." They recommend pasteurizing soil at 180°F for 20 minutes. I have followed this advice with consistent success.
Long-Term Success Based on My Experience
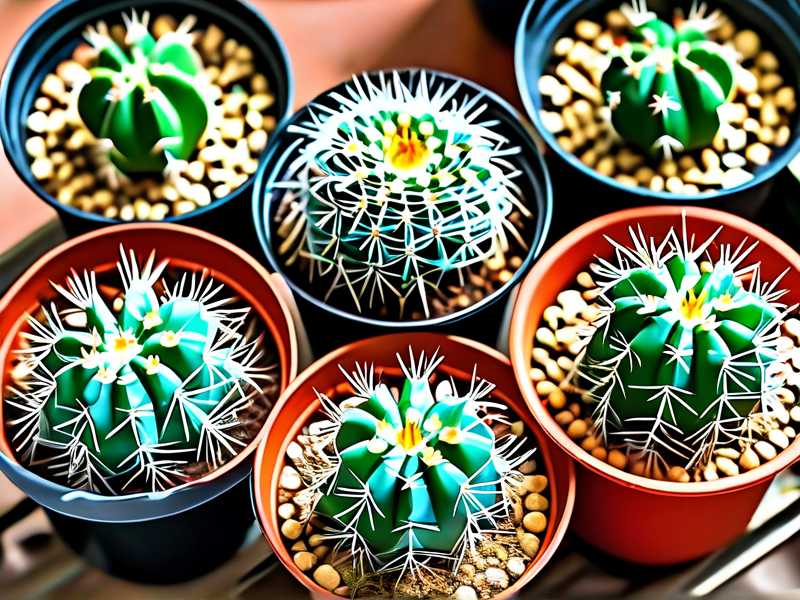
I now have over 200 cactus seedlings from multiple species, including astrophytum and mammillaria. The key lessons I carry forward are: never rush the hardening process, always use sterilized soil, and adjust watering based on the seedling's appearance, not a schedule. If you follow these steps, you will see strong, healthy growth within two weeks. The seedlings will develop thicker stems, deeper green color, and visible spines. That is the moment I know I have succeeded.
Frequently Asked Questions
How often should I water cactus seedlings in the first two weeks?
I water every morning with a fine mist for the first week. During week two, I bottom-water every 4 days, but only when the soil surface feels dry to the touch. Overwatering is the most common mistake.
Can I use cactus soil from a store for seedlings?
I do not recommend it. Store-bought cactus soil is too heavy and retains too much moisture. I make my own mix with sand, perlite, and coco coir. If you must use commercial soil, add 50% more perlite.
Why are my cactus seedlings falling over?
Falling over is usually caused by damping-off disease from overwatering or lack of air circulation. I reduce watering, improve ventilation, and apply a hydrogen peroxide spray. If seedlings are already collapsed, they cannot be saved. Remove them immediately to prevent spread.
Final Thoughts on Cactus Seedling Care
Taking care of cactus seedlings in their first growth stage requires patience, observation, and a willingness to adjust quickly. I have made every mistake imaginable, from overwatering to under-lighting. But each failure taught me something. Now, I approach each batch with a clear plan and a calm mindset. The first two weeks are the most critical. If you can keep your seedlings alive through that period, you have won half the battle. The rest is simply maintaining consistency. I hope my story helps you avoid the same pitfalls I encountered. Give your seedlings the gentle start they deserve, and they will reward you with years of beautiful growth.





