 bluename
 How to Separate Cactus Pups Sprouting Above the Surface of Pot Soil Easily
Honestly, the easiest way to separate cactus pups sprouting above the surface of pot soil is to stop watering for five days first. Then grip the pup at its base with folded newspaper. Twist gently, left and right, like unscrewing a lid. It pops right off. I know it sounds too simple. I killed two cacti before I found that rhythm. The real problem is everything around that moment. My first mistake was watering right before separating. That makes the stem mushy, and the pup just slips through your fingers. Here's what I do now. Wait until the soil is bone dry. Grab the pup where it joins the mother. Twist with steady, light pressure. Pulling straight up never works. Twisting does.
If you do it right, you'll feel a clean snap. You'll see a small, dry callus where they connected. That's exactly what you want.
Why Cactus Pups Sprout Above the Soil
Cactus pups, also called offsets, are not accidents. They're a survival strategy. The mother plant creates babies at its base to spread its genetics. Many cacti push pups up and out of the soil because that's where light hits. Sunlight triggers the areoles to wake up and grow outward. You'll notice pups forming on the lower sides of the stem, often just above the dirt line. This is completely normal. It's how clumping cacti like Echinopsis, Mammillaria, and Rebutia reproduce in the wild.
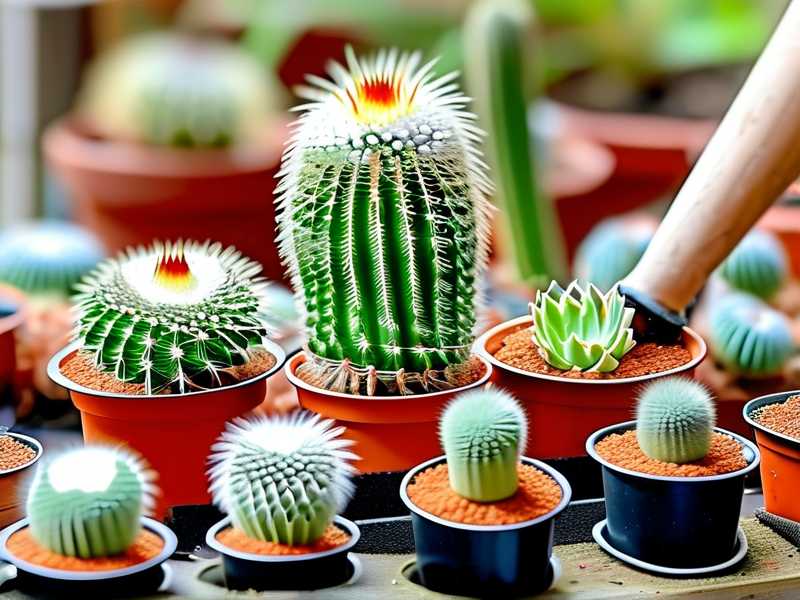
Some pups cling close to the mother. Others shoot out at odd angles. The above-surface pups are the easiest to separate because you can see exactly where the connection point is. Pups buried beneath the soil are trickier. You have to dig around and guess. Surface pups give you a clear target, and that saves you a ton of guesswork.
The Three Beginner Mistakes That Almost Ended My Cactus Collection
I learned the hard way. I lost a gorgeous golden barrel cactus to overwatering. I watched a Mammillaria stretch into something ugly because I gave it the wrong light. And I had a pot that was way too big for the plant, which kept the soil damp for days. If you're new to cactus care, avoid these three. They cover most of the reasons people fail at this task.
Mistake Number One: Watering Before You Separate
I promised myself I would never do that again. But I did. Twice. Watering loosens the soil and plumps up the cactus tissue. When you twist a hydrated pup, the flesh tears instead of snapping cleanly. The fibers stretch. You leave a jagged wound on both the mother and the pup. That open wound becomes a doorway for fungal rot. Honestly, most rot I've seen over the years traces back to a wet separation.
Wait until the soil is dry. Bone dry. You'll see the soil pull away from the pot edges slightly. That's the sign. You'll also notice the cactus feels firmer and a little less plump. That's the plant shifting from water storage to structural strength.
Mistake Number Two: Giving the Wrong Light After Separation
The second mistake I made with my first cactus pups was placing them in bright, direct sunlight right after separating. I figured cacti love sun, so more is better. Wrong. A freshly separated pup with no roots can't take up water effectively. Strong sunlight accelerates water loss through the skin. The pup shrivels within two days. I lost a beautiful Rebutia pup that way. It looked like a dried raisin by the end of the week.
What actually works is bright but indirect light. Put the separated pup on a windowsill that gets morning sun, or a few feet away from a south-facing window. This gives the pup time to push out roots without burning off its moisture reserves.
Mistake Number Three: Using a Pot That's Too Large
I made this error because I thought bigger pots meant bigger plants. Actually, large pots hold too much soil, and the soil stays wet longer. Cactus roots, especially young pup roots, drown in sustained moisture. The roots die off, then the whole plant rots from the bottom up.
For a baby cactus pup, choose a pot that's about one to two inches wider than the pup's diameter. Unglazed terracotta is my go-to. It breathes. It dries faster. It saves you from the silent killer of indoor plants: sitting in soggy soil. Most people don't realize this, but 90% of indoor plants die from overwatering. Cacti are no exception. They just take longer to show the damage.
What You Need Before You Touch the Pups
I use a few simple things. You don't need fancy equipment.
Thick gardening gloves. I wear leather ones with a rubber palm. They save my hands from the glochids and spines I can't see with my bare eyes.
Folded newspaper. I fold a sheet in half twice and use it as a grip pad. It holds the pup securely without bruising the flesh.
A clean, sharp knife. Sometimes the pup won't twist off. This happens when the connection has widened over time. In that case, I slice horizontally, flush against the mother's surface. A clean cut works better than a messy twist on older connections.
Sulfur powder or cinnamon. I dip the cut surfaces into sulfur powder to encourage callusing and prevent fungus. Cinnamon works too, and it's usually already in your kitchen.
A small pot with drainage holes. Remember, one to two inches of extra room around the pup. No bigger.
A well-draining cactus mix. I mix one part regular potting soil, one part coarse sand, and one part perlite. It drains quickly and dries out within a few days.
My Step-By-Step Method for Removing Cactus Pups
I've separated maybe thirty or forty pups over the last few years. I've settled into a routine that works almost every time. Here's the full process.
Step One: Stop Watering for Five Days
I check my watering calendar and make sure the plant has been dry for at least five days. The longer, the better. I once waited eight days in the summer. The soil was completely dry, and the pup twisted off with almost no resistance. The difference is night and day.
Step Two: Loosen the Soil Around the Base
I take a chopstick and carefully loosen the top half inch of soil around the pup. I want to see the connection point between the pup and the mother. I don't dig deep. I just create a small crater around the base. This gives me a clear view of what I'm working with.
Step Three: Grip and Twist
I place folded newspaper around the pup, high enough so the spines don't poke through. Then I grip the pup close to where it meets the mother. I twist gently. The key word is gently. If I meet resistance, I hold the twist and let the pup's own weight pull down a little. Usually, within ten seconds of gentle twisting, the pup separates with a soft pop.
Step Four: Check the Base
I examine the separated pup. A good separation has a clean, dry callus at the base. If there are rough edges or shredded fibers, I trim those with my knife. This is crucial. Any dangling tissue will rot later. I also check the mother plant's wound. If it looks jagged, I smooth it so the wound can heal evenly.
Step Five: Dust with Sulfur Powder or Cinnamon
I dip the base of the pup into sulfur powder, or brush on cinnamon. I do the same for the mother's wound. This small step pays off big over time. I've avoided so much rot by doing it every single time.
Step Six: Let the Pup Callus Over
This is the step most beginners skip. They want to plant the pup immediately. I get it. I did it too. But a fresh cut is an open wound. Planting it right away in moist soil is basically inviting rot to dinner. Instead, I set the pup on a dry paper towel in a warm, shaded spot. I wait five to seven days. The cut surface turns from wet pink to dry brown. That's the callus. Once it feels dry to the touch, the pup is ready.
Step Seven: Plant in a Small Pot
I fill a small terracotta pot with my cactus mix. I make a shallow hole in the center with my finger. I set the callused pup in the hole so its base rests just above the soil surface. I don't bury the green part. Then I put the pot in a spot with bright, indirect light.
Step Eight: Wait Before Watering
Here's where I disagree with some forum advice. Some say water immediately after planting. I never do. I wait another week. I want the callused base to send out root tips first. Water encourages roots, but if there are no roots yet and the soil is wet, the base can rot. So I wait until I see tiny pink root tips poking out of the drainage holes, or until the pup shows new green growth near the top. That's my cue to water.
My Two-Week Observation After Separating Pups
I kept a detailed journal for two weeks after my last batch of separations. This is what I wrote down.
Day One to Day Three: The Callusing Phase
All four pups sat on my kitchen counter. The room was warm, around 22 degrees Celsius, with no direct sun on them. By day three, the cut surfaces had turned dry and slightly indented. The color shifted from pale green to a woody brown. No mushiness. That was a good sign.
Day Four to Day Seven: The Waiting Game
I planted each pup in its own small pot. I did not water them. I placed them on a shelf that gets morning sun for about two hours. The rest of the day, they got bright ambient light. On day seven, I checked the bottom drainage holes of one pot. I saw two tiny pink nubs. Roots were coming. I resisted the urge to water.
Day Eight: First Watering
I watered the pup that had visible roots. Not deeply. I used a small squeeze bottle and directed water around the base, avoiding the plant body. The soil was dry within twenty-four hours. That told me the mix was well-draining and the pot was the right size.
Day Ten to Day Fourteen: Visible Change
Around day ten, I noticed the pups looking greener and firmer. One of them had a small bulge at the base, just above the soil line. That was new growth. By day fourteen, two of the four pups had clearly settled in. They felt anchored when I gently nudged them. The other two were slower, but I saw root tips at the drainage holes of both. All four survived. That was a massive improvement over my first attempt, where I lost every single pup.
Obstacles I Hit Along the Way
I want to be honest with you. Not every separation goes smoothly. Here are the three problems I ran into most often, and how I fixed them.
The Pup Broke Off Without a Clean Base
One time I twisted a pup and it snapped with a rough, ugly edge. The base looked ripped, not cut. I panicked at first. Then I trimmed the jagged edge with a sterile knife and dusted the wound with sulfur powder. It callused over in six days. That pup is now growing fine in its own pot. So if this happens to you, don't panic. Just trim and callus.
The Pup Was Too Close to the Mother to Twist
Another time, a pup grew flush against the mother's stem. There was no room to grip anything. I couldn't get my fingers in the gap. I used clean tweezers to hold the pup slightly away from the mother. Then I slid a scalpel blade flat into the tiny gap and sawed gently sideways. It took about two minutes of careful back-and-forth, but the pup came off cleanly. It worked.
The Mother Plant Leaned After I Removed the Pups
This happened with a mature Echinopsis. I removed three large pups from one side, and suddenly the mother looked lopsided. She was leaning toward the empty side. I solved it by repotting the mother into a slightly larger pot and placing a few small rocks under the lean side for a week. Once the roots re-established, she straightened right up. Not a big deal. Just a little time and patience.
When to Leave the Pups Attached
Sometimes separation is a bad idea. I learned this through trial and error. Pups smaller than one quarter of the mother's size are usually not ready. They don't have enough stored energy to survive on their own. Removing them just leaves you with a shriveled baby and a wounded mother. Just wait.
Also, if the pup is growing completely underground, I leave it alone. Digging around and cutting blindly is a recipe for damaging the parent's roots. There's no benefit to taking that risk.
I used to follow the advice that you should separate pups as soon as they appear. Now I wait until the pup is at least one third the size of the mother, or until it has visible roots of its own. This patience made all the difference in my success rate.
The Right Timing for Separating Cactus Pups
Spring is the best season for this job. I only separate cactus pups in the early growing season, which for most cacti is late spring to early summer. The plant is actively pushing out new growth, so it heals faster. I avoid autumn and winter entirely. The plant is dormant, and low light makes callusing much slower. I've learned to fight the temptation, even when a pup looks ready in winter. It can wait a few months. The plant won't mind.
If you want to improve your results with cactus pups propagation, the timing matters just as much as the technique. Start in spring, and you'll give your pups the best possible chance to establish roots before the cooler months arrive.
What I Learned from Expert Sources
The [RHS](https://www.rhs.org.uk target="_blank") says that good hygiene when taking plant cuttings is essential to prevent rot. I learned this the hard way, using a knife that wasn't clean. I gave both the mother and the pup a fungal infection. Now I wipe my knife with rubbing alcohol before every cut. It takes five seconds and saves me weeks of recovery.
The [AHS](https://ahsgardening.org target="_blank") also emphasizes that cutting material should be healthy and free of pests. I check the pup for mealybugs and scale before I even think about removing it. If I see any insects, I treat the whole plant first. That practice has saved me from spreading pests across my entire collection.
Frequently Asked Questions
How long should I wait before separating cactus pups?
I wait until the pup reaches at least one third of the mother's size, and I make sure the soil is dry for at least five days before separation. During the active growing season, that's usually enough. The pup should have a few spines and a firm, rounded stem. If it still looks soft or pale, I leave it a little longer.
Can I plant the cactus pup immediately after removing it?
No, I don't recommend it. Let the cut base callus for five to seven days first. I keep the pup on a dry paper towel in a warm, shaded spot. When the base looks dry and brown, that's the callus. Planting before callusing is the quickest way to invite rot. I've lost pups exactly that way.
What if my cactus pup has no roots?
That's normal. Most pups I separate don't have roots at the moment of separation. They form roots after callusing and planting. If your goal is to remove cactus pups from soil without any drama, just keep the soil dry for the first week. Wait for root tips to appear at the drainage holes. Once you see those, start watering lightly.
Final Thoughts on Separating Cactus Pups
If I could tell my younger self one thing about separating cactus pups sprouting above the surface of pot soil, it's this. Let the soil dry. Twist gently. Callus the wound. And wait. The waiting is the hard part. I'm an impatient person. I wanted to plant my pups immediately and watch them grow. That impatience cost me several plants.
Just remember these numbers. Five days of dry soil before separating. Five to seven days for the pup to callus. Another week before the first watering. These small waits add up to consistent, healthy growth. They save you the heartbreak of watching a pup shrivel up.
Take my word for it. I've been through it all. The wet messes, the burned babies, the oversized pots, the rot. It took me a long time to figure this out, but now the process feels automatic. You'll get there too. Pick your first pup, keep your hands steady, and twist.
Good luck.





