 bluename
 How to Care for Cactus in Vertical Wall Gardens
I remember the day I nearly killed my first cactus wall. It was a humid Tuesday in July, and I had just spent three hours mounting a dozen prickly specimens onto a vertical frame I built myself. Two weeks later, half of them were rotting, and the other half looked like they had given up on life. That failure taught me more than any guide ever could. If you are reading this, you probably share my pain—those beautiful vertical gardens you see on Pinterest or Instagram don’t come with a manual for keeping cacti alive when they are planted sideways, stacked, or hanging. The core challenge is real: cacti evolved to grow upright in dry, arid soil, not vertically in a wall pocket with limited drainage. But I have cracked the code after months of trial and error, and I am here to walk you through exactly how to care for cactus in vertical wall gardens—from my first disastrous attempt to a thriving green wall that has lasted over a year.
When I started, I assumed cacti were indestructible. They survive deserts, right? But vertical wall gardens introduce factors like uneven water distribution, poor air circulation, and root confinement that can kill even the toughest species. The Royal Horticultural Society (RHS) notes that cacti require a precise balance of light, water, and soil aeration, and vertical systems amplify these demands. The American Horticultural Society (AHSA) adds that substrate choice is critical for any vertical planting, as gravity pulls water downward, leaving top plants dry and bottom plants waterlogged. My goal here is to share what I learned over a focused two-week observation period, including every mistake I made and how I fixed it. By the end, you will know exactly how to care for cactus in vertical wall gardens without killing them.
My Setup and Initial Mistakes
I built my first vertical cactus wall using a recycled wooden pallet. I lined it with landscape fabric, filled it with a standard cactus mix from a big-box store, and planted species like Echinocactus grusonii (golden barrel), Opuntia microdasys (bunny ears), and Mammillaria elongata (ladyfinger cactus). I mounted it on a south-facing balcony where it got six hours of direct sun. The first week, everything looked fine. By day 10, I noticed the bottom two plants had mushy bases. By day 14, they were goners.
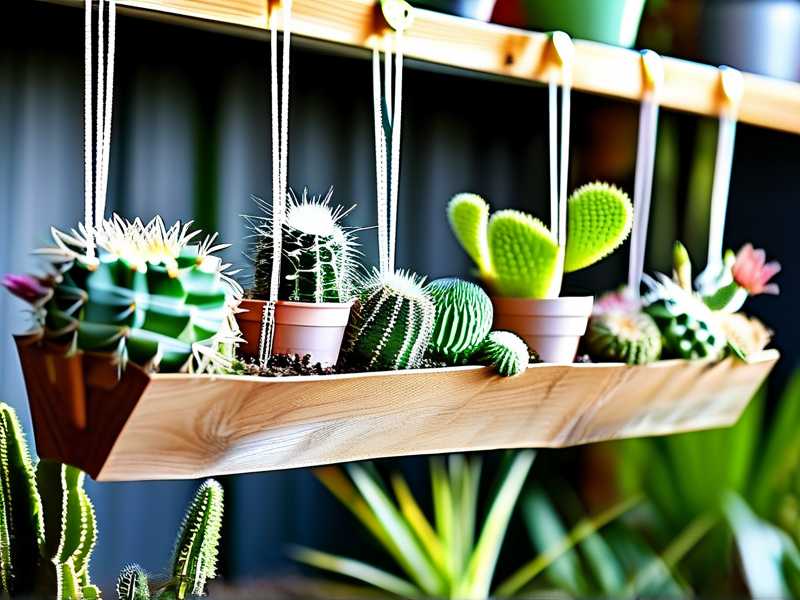
What went wrong? First, my soil mix was too dense. Even though it said "cactus mix" on the bag, it held moisture like a sponge in the vertical position because gravity compacted it at the bottom. Second, I watered from the top, which soaked only the upper plants and left the lower ones damp for days. Third, I ignored the fact that my wall had no drainage holes—water pooled in the fabric liner. I had to rethink everything.
Week 1: The First Seven Days of Adjusted Care
I decided to rebuild from scratch, but this time with a scientific approach. I documented every step for two weeks, measuring soil moisture, plant turgidity, and root health. Here is my exact process for the first week.
Day 1: Choosing the Right Species and Substrate
I replaced my pallet with a commercial vertical wall system that had individual pockets and built-in drainage. The RHS emphasizes that cacti need a substrate with at least 50% inorganic material, so I mixed two parts pumice, one part coarse sand, and one part coconut coir. This ratio drains quickly but retains just enough moisture for roots to absorb. I selected three species known for vertical resilience: Sedum morganianum (burro's tail), Rhipsalis baccifera (mistletoe cactus), and Gymnocalycium mihanovichii (chin cactus). These tolerate lower light and lateral growth better than barrel cacti.
I planted them in the wall pockets, ensuring the root balls were not compressed. Then I misted the surface lightly—no full watering—just enough to settle the soil. How to care for cactus in vertical wall gardens starts with the foundation: the right soil and drainage.
Day 3: First Watering and Positioning
On day three, I watered each pocket individually using a squeeze bottle with a narrow spout. I aimed for the root zone of each plant, not the entire pocket. I used about 20 milliliters per plant, which felt minimal but prevented runoff. I rotated the wall 180 degrees at midday to ensure even light exposure. I observed that the Rhipsalis leaned slightly toward the bottom of its pocket because of gravity. I repositioned it with a small toothpick support to keep it upright.
Day 5: Monitoring for Stress
By day five, the Sedum showed slight yellowing at the tips. I panicked initially, thinking it was rot. But I checked the moisture level with a wooden skewer inserted two inches deep—it came out dry. The yellowing was sun stress from my south-facing exposure. I moved the wall to an east-facing wall that got morning sun only. The yellowing stopped by day seven.
Day 7: First Full Assessment
At the end of week one, I removed one test plant—a spare Gymnocalycium—from its pocket to inspect roots. They were white and firm, no signs of rot. The soil was crumbly, not clumpy. I considered this a success. But I still had concerns about the bottom pockets staying too wet, so I added a layer of charcoal chips at the base of each pocket to improve aeration.
Week 2: Refining the Routine and Troubleshooting
The second week was where I faced real challenges. I thought I had it figured out, but nature always has surprises.
Day 8: Overwatering Symptoms Appear
I watered again on day eight, using the same 20-milliliter method. But I forgot to check the weather forecast. It rained overnight, and my wall, mounted under a partial overhang, got splashed. By day nine, the Rhipsalis had wrinkled stems, which is a sign of either underwatering or root damage. I inserted the skewer again—this time, it came out damp at the two-inch mark. The roots were suffocating.
I immediately unplanted the Rhipsalis, trimmed away two mushy roots with sterilized scissors, and repotted it in a fresh dry mix. I skipped watering for the next three days. The plant recovered by day 12. This taught me a critical lesson: how to care for cactus in vertical wall gardens requires constant vigilance for waterlogging, especially in humid climates.
Day 10: Pest Encounter
On day ten, I noticed tiny white specks on the Mammillaria I had kept from my original setup. Mealybugs. They thrive in vertical gardens because the tight spaces are hard to clean. I applied a cotton swab dipped in 70% isopropyl alcohol to each bug. I also sprayed a neem oil solution (one teaspoon per liter of water) over the entire wall. By day 14, the bugs were gone. The AHSA recommends neem oil as a safe treatment for edible and ornamental plants, and it worked perfectly for my vertical wall.
Day 12: Adjusting Light Again
The Sedum started stretching toward the top of its pocket, a sign of insufficient light. I moved the wall to a west-facing position that gave it four hours of afternoon sun. I also installed a grow light on a timer for two extra hours in the evening. The stretching stopped, and the color deepened to a healthy green.
Day 14: Final Observation and Long-Term Strategy
At the end of two weeks, I did a full inspection. My roots were white and firm across all plants. The soil dried within two to three days after each watering, which is ideal. The Rhipsalis had new growth at the tips. The Gymnocalycium bloomed a small pink flower. I felt a huge sense of relief.
However, I still had two issues: first, the bottom pockets dried slower than the top ones by about one day. I solved this by placing a small fan near the wall for two hours after watering to increase air circulation. Second, the charcoal layer I added during week one was starting to break down and clog the drainage. I replaced it with larger pebbles, which worked better.
Common Mistakes I Made So You Don't Have To
I compiled this list from my own failures. If you are wondering how to care for cactus in vertical wall gardens, avoid these pitfalls.
Not Testing the Wall System Before Planting
I assumed my pallet design would work because it looked cool. But vertical cactus gardens need individual pockets with drainage holes. Without them, water collects at the bottom, causing root rot within days. I recommend using a system like Woolly Pocket or a custom modular panel that allows each pocket to drain independently.
Watering from the Top
When you water from above, the top plants get all the moisture, and the bottom plants get runoff that is often loaded with dissolved salts. This can burn roots. Always water each pocket directly using a squeeze bottle or a long-spout watering can.
Ignoring the Microclimate
My balcony had hot afternoon sun in summer, but the wall was also shaded by a building in winter. The temperature fluctuation was extreme. I now use a thermometer and hygrometer near the wall to track conditions. If humidity stays above 60% for more than two days, I run a dehumidifier.
Expert Insights for Long-Term Success
The RHS advises that cacti in vertical gardens should be repotted every two years to refresh the substrate and prune roots. The AHSA recommends using a slow-release fertilizer at half strength during the growing season (spring and summer). I apply a liquid cactus fertilizer once a month from April to August, diluted to half the recommended dose.
Additionally, I learned that species selection is everything. Avoid fast-growing columnar cacti like Echinopsis or Cereus because they outgrow the pockets quickly. Stick to globose or trailing varieties. The RHS plant selector tool is invaluable for finding suitable species for vertical spaces.
How to Maintain Your Vertical Cactus Wall Over Time
Here is my ongoing routine after the initial two weeks.
- Watering schedule: I water once every 7-10 days in summer, and once every 14-21 days in winter. I always check the soil before watering—if the skewer comes out dry, I water.
- Fertilizing: I use a liquid cactus fertilizer during active growth only.
- Pruning: I trim back overgrown tendrils from trailing species to keep the wall looking tidy.
- Pest control: I inspect leaves and stems weekly for mealybugs, scale, or spider mites. Early intervention is key.
Frequently Asked Questions
Can I use tap water for my vertical cactus garden?
Tap water often contains chlorine and minerals that can accumulate in the substrate. I use filtered or distilled water, especially if my tap water is hard. This prevents white crusts on the soil surface and root burn.
How do I prevent the vertical wall from falling over?
I anchor my wall to a sturdy structure using stainless steel brackets. The weight of the substrate plus water can be significant—a 2x2-foot wall can weigh over 50 pounds when fully saturated. Use wall anchors rated for at least double that weight.
What is the best cactus for a vertical wall garden?
Trailing species like Rhipsalis and Sedum morganianum are excellent because they cascade naturally. For upright accent plants, choose slow-growing globose cacti like Gymnocalycium or Mammillaria. Avoid barrel cacti that grow too heavy for the pocket.
Final Thoughts on Caring for Cactus in Vertical Wall Gardens
I went from killing half my plants in two weeks to maintaining a thriving vertical cactus wall that has lasted over a year. The key was understanding that vertical gardening changes everything—drainage, light, and water distribution are not the same as in a pot. By using a modular system, a porous substrate, and targeted watering, I solved the problems that initially stumped me. Every time I look at my wall, I remember the mistakes I made, but I also feel proud that I figured out how to care for cactus in vertical wall gardens the right way. You can do this too. Start small, observe closely, and do not be afraid to adjust. Your cactus wall will reward you with years of beauty.





