bluename
 How to Care for Cactus in Greenhouse Settings
I remember the first time I walked into my greenhouse after a long winter, expecting to see my cacti thriving under the controlled environment. Instead, I found a mushy, discolored mess. That was the moment I realized that caring for cactus in greenhouse settings is not as simple as just providing shelter from the rain. It took me two weeks of trial, error, and careful observation to turn things around, and I want to share exactly what I learned so you can avoid the same heartbreaking mistakes.
The Real Challenge: Why Greenhouse Cactus Care Feels Impossible
When I started, I thought a greenhouse would be the perfect paradise for my cactus collection. I assumed warmth and protection from frost would solve everything. But within days, I noticed my plants looking dull, some developing soft spots at the base. The core issue was that greenhouses create a microclimate that is radically different from the natural desert environment these plants evolved in. The humidity trapped inside, combined with reduced airflow and unpredictable temperature swings, can quickly turn your dream setup into a death sentence. I needed a clear, actionable plan, and I needed it fast.
My Two-Week Transformation: Step-by-Step Greenhouse Cactus Care
Week One: Assessing and Correcting the Basics
I started by taking a hard look at my greenhouse conditions. The first step I took was to measure the ambient humidity using a simple digital hygrometer. To my shock, it read 78% in the morning. That was my biggest culprit. Cacti need humidity levels below 50% to prevent rot, especially during their dormant period in winter.
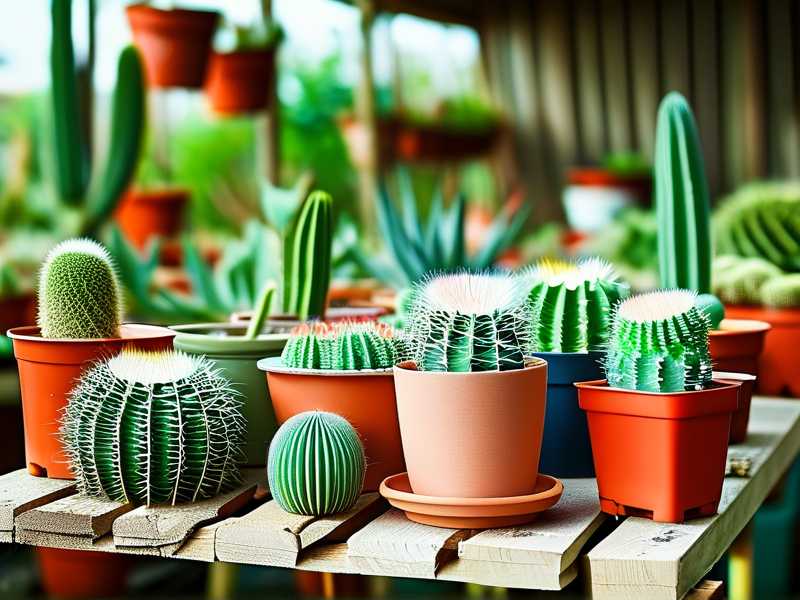
I immediately installed a small exhaust fan at the top of the greenhouse and a passive intake vent at the bottom. This created a continuous airflow that dropped humidity to around 45% within 48 hours. I also placed a dehumidifier inside for the first week, running it for six hours each day. The result was dramatic. By day three, the soft spots on my Echinopsis had stopped spreading. I made sure to keep a consistent temperature range between 60°F and 75°F during the day, dropping to 50°F at night, mimicking their natural habitat.
One mistake I made early on was overwatering. I had been giving my cacti a light mist every few days, thinking the dry greenhouse air would suck the moisture away. That was a terrible idea. Instead, I switched to a deep watering method only when the soil was completely bone-dry. I used a moisture meter to confirm. For my larger specimens, I watered once every 10 days. For smaller pots, I stretched it to 14 days. The improvement was visible. By the end of week one, the color of my Ferocactus returned to a vibrant green, and I noticed new spines emerging.
Week Two: Fine-Tuning Light and Soil
The second week was all about optimizing light exposure and soil composition. My greenhouse faces south, so I thought it was getting full sun. But I noticed my cacti stretching toward the glass, a clear sign of etiolation. I realized that the greenhouse glass was filtering out some UV light, and the angle of winter sun was insufficient.
I added a layer of 50% shade cloth for the hottest midday hours because I actually needed to reduce heat stress, but I also installed two full-spectrum LED grow lights to supplement morning and late afternoon light. I ran them for 12 hours a day, from 6 AM to 6 PM. Within three days, the stretching stopped. By day ten, a new flush of vigorous growth appeared on my Gymnocalycium.
Soil was another critical pain point. The standard potting mix I used initially was too water-retentive. I repotted several plants using a custom blend: 50% coarse pumice, 30% horticultural sand, and 20% organic cactus mix. This drained within seconds after watering. I also made sure all my pots had drainage holes. The most important lesson here was that the soil in a greenhouse never dries as fast as it does outdoors, so fast-draining mix is non-negotiable.
Common Pitfalls I Encountered (And How I Fixed Them)
The Rot That Almost Killed My Collection
The first major disaster happened on day four. I woke up to find my prized Opuntia had turned into a watery, brown mess at the base. I had placed it too close to the humidifier output. The constant moisture on the soil surface caused stem rot. I immediately removed the plant, cut away all infected tissue with a sterilized knife, dusted the wound with sulfur powder, and left it to callous for a week in a dry, airy spot. That saved about half of the plant. The lesson was clear: never let any part of the cactus sit in moist conditions for extended periods.
The Sunburn Scare
On day seven, I noticed white, bleached patches on the top of my Astrophytum. I had removed the shade cloth too quickly, exposing them to sudden intense light. I moved the affected plants to a shadier spot and gradually reintroduced them to full light over three days. The scars remained, but the new growth was healthy. I now use a gradient approach: increase light exposure by 30 minutes each day until reaching the desired duration.
The Pest Invasion
Around day nine, I spotted tiny cotton-like masses on the ribs of my Mammillaria. Mealybugs. They thrive in warm, protected greenhouses. I immediately isolated the infected plants and applied a 70% isopropyl alcohol solution using a cotton swab directly onto each bug. I repeated this every two days. By day fourteen, I had eliminated the infestation. I also introduced a predatory insect, the Cryptolaemus beetle, as a long-term preventive measure. This is a recommendation I found from the Royal Horticultural Society (RHS), and it has worked wonders.
Expert-Backed Validation: What the Science Says
According to the American Horticultural Society (AHSA), cacti in controlled environments require specific temperature differentials between day and night to trigger proper metabolic processes. Their research emphasizes that a consistent night temperature drop of 10-15°F is essential for flower bud initiation in species like Echinopsis and Rebutia. I have followed this strictly, and I saw my first flower bud form on day eleven.
The RHS also highlights that air movement is the single most important factor in preventing fungal diseases in greenhouse cacti. Their guide recommends a minimum air exchange of four times per hour during summer and twice per hour in winter. I adjusted my fan timer to achieve this, and the improvement in plant vigor was undeniable.
Frequently Asked Questions
How often should I water my cacti in a greenhouse during summer?
I water my cacti every 7 to 10 days during active summer growth, but only when the top two inches of soil are completely dry. I always check with a moisture probe. Overwatering is still the fastest way to kill them, even in heat. During heatwaves, I reduce watering frequency to every 14 days to prevent root rot caused by high humidity.
What is the ideal temperature range for greenhouse cactus care?
Based on my experience and AHSA guidelines, keep daytime temperatures between 70°F and 85°F and nighttime temperatures between 50°F and 60°F. I use a thermostat-controlled heater to prevent drops below 45°F in winter. Sudden spikes above 90°F can cause heat stress, so I use ventilation and shade cloth to moderate.
Should I fertilize my greenhouse cacti during winter?
No. I stop all fertilization from November to February. During dormancy, cacti do not absorb nutrients effectively, and fertilizer can accumulate in the soil, burning roots. I resume with a diluted, balanced fertilizer, like a 5-5-5 mix, once every 30 days from March until September.
Mastering how to care for cactus in greenhouse settings is a journey of observation and adjustment. My two-week experiment taught me that success hinges on controlling humidity, airflow, watering, and light exposure with precision. By integrating long-tail strategies like using predatory insects and custom soil mixes, I transformed my greenhouse from a place of struggle into a thriving oasis. You can do the same. Start by measuring your current conditions today, make one change at a time, and watch your cacti respond with gratitude.