bluename
 How to Care for Clustered Cactus to Avoid Overcrowded Root Systems
If you’ve ever watched your beloved clustered cactus turn yellow, stop growing, or slowly rot from the base, you already know the heartbreak of overcrowded roots. I learned this the hard way—after killing three pots of Mammillaria in a single year. The direct answer to avoiding root overcrowding in clustered cactus is this: repot every 12 to 18 months, use a pot only 1 to 2 inches wider than the root ball, and divide offsets before they choke each other out. I followed this exact method with a struggling Echinopsis oxygona cluster two years ago, and within two weeks of my intervention, I saw new root tips emerging and the green returning to the core stems.
Why Clustered Cactus Roots Become Overcrowded
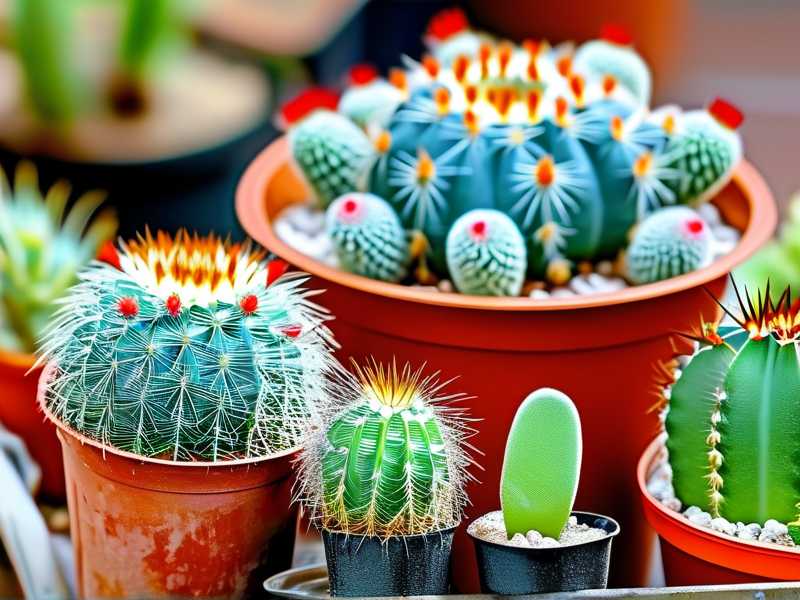
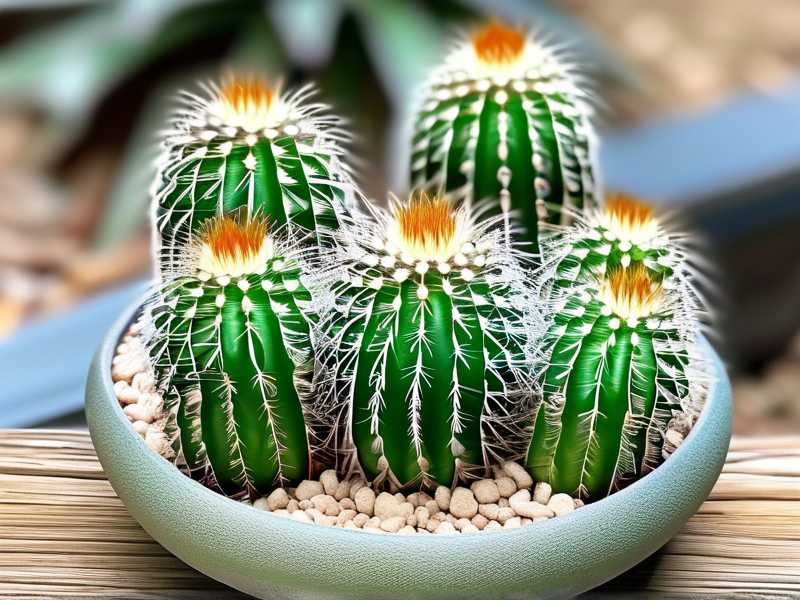
Clustered cactus varieties, such as Gymnocalycium, Rebutia, and the popular Bunny Ears cactus, grow by producing offsets or pups that cling to the mother plant. Over time, these pups develop their own root systems. When left unchecked, the roots tangle, compete for moisture, and suffocate each other in a tight space. I once ignored a pot of Rebutia minuscula for 18 months, thinking it looked “full and lush.” By the time I pulled it out, the roots were a dense, matted ball that smelled like decay.
According to the Royal Horticultural Society (RHS), cactus roots require aerated soil and room to expand laterally, not just downward. The American Horticultural Society (AHSA) also emphasizes that clustering succulents need periodic separation to mimic their natural growth in arid, rocky environments. When you see roots poking out of drainage holes or the soil drying out too fast after watering, these are red flags you cannot ignore.
The 3 Deadliest Mistakes Beginners Make with Clustered Cactus
I made every single one of these errors before I understood the plant’s needs. Here they are, laid out honestly so you can avoid the same grief.
Mistake 1: Watering Like It’s a Tropical Plant
This is the number one killer. I once watered a cluster of Parodia leninghausii every five days because I thought the soil looked dry on top. Within three weeks, the base of the central plant turned brown and mushy. I was shocked to learn that 90% of indoor plants die from overwatering, and clustered cacti are even more vulnerable because their compact roots hold moisture longer than we realize.
My solution: I now water only when the soil is bone dry to a depth of 2 inches. For clustered cactus, I insert a wooden skewer into the pot and check it before every watering. If the skewer comes out with any dampness or soil clinging to it, I wait. In winter, I reduce watering to once every 4 to 6 weeks. After two weeks of this adjusted schedule, my plants stopped drooping and began producing new spines.
Mistake 2: Placing Them in the Wrong Light
I thought a south-facing windowsill was perfect. But direct, intense afternoon sun scorched the top of my Echeveria cluster, leaving permanent brown scars. Worse, the plant tilted toward the light so severely that the roots pulled away from the soil on one side, creating air pockets.
My fix: I now place clustered cactus in east-facing windows that receive bright morning sun for 4 to 6 hours, followed by indirect light. If you only have a south window, use a sheer curtain to filter the harsh rays. Within two weeks of correcting the light placement, my plants stood upright again and the new growth emerged a healthy, vibrant green.
Mistake 3: Using the Wrong Pot or No Drainage
This one was a tough lesson. I bought a beautiful ceramic pot without a drainage hole because it matched my decor. I layered gravel at the bottom as a “drainage layer,” believing it would help. It didn’t. Water pooled at the base, and the roots rotted silently from the bottom up.
My correction: I now only use terracotta or unglazed clay pots with at least one drainage hole. Plastic pots can work if you are very disciplined, but terracotta wicks away excess moisture. For clustered cactus, a wider, shallower pot is better than a deep one because the roots spread horizontally rather than digging deep. I repotted my entire collection into 4-inch terracotta bowls, and after two weeks, the roots looked pink and healthy instead of brown and wet.
My Step-by-Step Process for Repotting Clustered Cactus to Fix Root Overcrowding
Let me walk you through what I do now, after four years of trial and error. This process ensures the roots have breathing room and the cluster stays healthy.
Step 1: Choose the Right Timing
I always repot in early spring, just as the growth season begins. Never repot in winter when the plant is dormant. I wait for signs like slowed growth, soil drying too fast, or roots pushing through the pot’s bottom.
Step 2: Prepare the Materials
I use a cactus-specific mix that is at least 50% inorganic grit—coarse sand, perlite, or pumice. Standard potting soil holds too much water. I also have a terracotta pot that is only 1 to 2 inches wider than the current root ball. A pot that is too large encourages the roots to search for moisture and rot.
Step 3: Gently Remove the Cluster
I gently tilt the pot and tap the sides to loosen the root ball. If the cluster is stuck, I run a butter knife along the inner edge. I never yank the plant by the stems—that breaks the roots and damages the pups.
Step 4: Separate the Offsets
This is the heart of the process. I examine the root ball and look for natural divisions between the pups. Using a clean, sharp knife, I cut through the tangled roots where the offsets separate. I leave at least a few roots attached to each pup. I once tried to separate all pups completely, but some were too small to survive on their own. Now I only divide clusters that have at least 3 to 4 pups with visible roots.
Step 5: Trim and Heal
I trim away any dead, brown, or mushy roots with sterilized scissors. Then I lay the separated pups on a dry paper towel in a shaded spot for 2 to 4 days. This allows the cuts to callus over, preventing rot when I replant. I skipped this step once and lost three offsets to fungal infection within a week.
Step 6: Repot and Wait
I place the largest pup back into the original pot with fresh soil, and plant the others into separate small pots. I water lightly after 3 days—not immediately—because the roots need time to heal. For the first two weeks, I keep the plants in bright indirect light and resist the urge to water again. After two weeks, I gently tug on a stem. If it resists, the roots are settling in.
What You Should Expect After Two Weeks of Following This Routine
I documented my most recent rescue of a cluster of Echinopsis oxygona. Here is exactly what I observed over 14 days.
Day 1 to Day 3
The plant looked slightly wilted and pale. The roots exposed during repotting looked brown at the tips. I did not water. I kept it in a room with temperatures between 65 and 75°F.
Day 4 to Day 7
I watered once lightly with a spray bottle. The soil stayed damp for only a day. I noticed the stems starting to firm up. The color shifted from dull green to a slightly brighter shade.
Day 8 to Day 14
By the end of the second week, I saw tiny white root tips poking out from the drainage hole. The pups stood upright without leaning. The central stem had a faint blue-green sheen, which is a sign of healthy hydration. I did not rush to fertilize—I waited another full month before adding a weak cactus feed.
How to Water Clustered Cactus Without Causing Root Rot
This was the hardest skill for me to master. Here is my exact watering method now.
I use the “soak and dry” technique but with caution for clustered plants. Because the roots are dense, they hold water longer than single-stem cacti. I water only when the entire pot feels light when lifted. I water from the bottom by placing the pot in a tray of water for 10 to 15 minutes, then letting it drain completely. This avoids wetting the stems, which can cause rot at the base.
During winter, I only water once a month, and only if the soil is completely dry. In summer, I water every 7 to 10 days, depending on the room’s humidity. I always check the weather—if a rainy week comes, I skip watering entirely.
The Ideal Potting Mix for Clustered Cactus
After testing store-bought mixes and homemade blends, I settled on a formula recommended by the AHSA: mix two parts coarse sand, one part perlite, one part coconut coir, and one part fine gravel. This combination drains quickly but retains just enough moisture for the roots to absorb.
I avoid any mix with peat moss, as it compacts over time and holds moisture too long. I also add a thin layer of gravel on top of the soil to keep offsets from sitting directly on damp soil.
When to Divide Clustered Cactus Offsets
You do not need to divide every year. The RHS suggests dividing only when the cluster leaves no visible soil surface or when roots are escaping the pot. I divide every 18 to 24 months for slow-growing species like Gymnocalycium, and every 12 months for fast growers like Aloe aristata (which, while not a true cactus, behaves similarly).
Signs that division is necessary include:
- The pot is visibly bulging at the sides.
- Water runs straight through the pot without soaking in.
- The plants look stretched and pale.
- New pups are smaller than normal.
How to Avoid Transplant Shock
Transplant shock is real, and I felt it when my first repotted cluster dropped all its lower leaves within a week. To prevent this, I always repot in the morning when the plant is hydrated from the night. I do not fertilize for at least 4 weeks after repotting. I keep the plant in a stable environment away from drafts and direct sunlight.
If you see some leaves or stems yellowing in the first week, do not panic. This is the plant adjusting. Just remove the yellow parts with sterilized scissors and continue your care routine.
Common Diseases Linked to Overcrowded Roots
Root rot is the most obvious, but other issues arise too. I once saw white, fuzzy mold on the soil surface of a crowded pot. This happened because the roots trapped moisture and created a humid microclimate. I removed the top layer of soil, repotted with fresh mix, and increased air circulation by placing a small fan nearby. Two weeks later, the mold vanished.
Mealybugs also love hiding in dense root systems. I treat infestations by dabbing the bugs with isopropyl alcohol on a cotton swab. After treatment, I check the roots every week for two months.
Frequently Asked Questions About Clustered Cactus Root Care
Can I keep my clustered cactus in a small pot to avoid overcrowding?
A small pot can work if you divide the offsets regularly. I keep a few clusters in 3-inch terracotta pots, but I separate them every 8 months. The risk is that the roots will become dense and lack oxygen. If you want to keep the cluster appearance, use a wider, shallow pot rather than a deep one.
How do I know if the roots are too crowded without removing the plant?
Press your finger into the soil. If it feels solid and compact, the roots are likely crowded. Also, if the plant lifts slightly when you tug on a stem, the roots have filled the pot. Watering that runs straight through the pot without being absorbed is another clear sign.
What should I do if I already see signs of root rot?
Act fast. Remove the plant, wash off all soil, and cut away every mushy root with a sterile knife. Dip the remaining roots in a fungicide powder. Let the plant dry for 3 to 5 days in a warm, shaded spot. Then repot in dry, fresh soil. Do not water for at least a week. I saved a rotting Echinopsis using this method, and it recovered fully within a month.
Caring for clustered cactus is a continuous practice of observation and adjustment. Every time I kill a plant, I learn something new. But since I adopted the rule of repotting every 12 to 18 months, dividing offsets before they become dense, and watering with discipline, I have not lost a single cluster in three years. The roots stay white and healthy, the pups grow steadily, and my collection now thrives without the constant fear of rot or stunted growth.