bluename
 How to Water Cactus Using the Bottom-Watering Method
Why I Switched to Bottom-Watering for My Cacti
Let me cut straight to the chase. I have killed more cactus plants than I care to admit. It took me years to realize the problem wasn't my love for them, it was how I watered them. 90% of indoor plants die from overwatering, and cacti are the most sensitive victims. If you want to water cactus using the bottom-watering method, here's the simple truth: stop pouring water on top, start soaking from below. I learned this lesson the hard way after watching my beloved saguaro rot from the inside out. In this article, I'll walk you through everything I know about bottom-watering cactus, including my personal mistakes, the two weeks of observation that changed my approach, and the exact steps you need to follow.
My Journey with Cactus Watering: The Struggle Was Real
I used to think cactus watering was straightforward. Pour some water, wait a few weeks, repeat. That mindset killed my first five plants. I remember staring at my shriveled barrel cactus, wondering where I went wrong. The soil was bone dry on top, so I assumed the plant was thirsty. In reality, the roots had drowned weeks earlier because moisture had pooled at the bottom of the pot.
I tried everything. Watering schedules, moisture meters, even talking to my plants. Nothing worked. Then I stumbled upon the bottom-watering method while reading an article from the Royal Horticultural Society (RHS). Their recommendation about deep root hydration made me rethink everything. I started experimenting with my own collection, keeping detailed notes for two full weeks.
What Is Bottom-Watering and Why It Works for Cacti
Bottom-watering is exactly what it sounds like. Instead of pouring water onto the soil surface, you place the pot in a tray of water. The plant absorbs moisture from the drainage holes at the bottom. This method encourages deep root growth and prevents the topsoil from staying wet.
I discovered that cacti evolved to absorb water from occasional desert rains. These rains soak the ground deeply, then the surface dries quickly. Top-watering mimics rain, but our indoor environments don't allow for proper evaporation. The American Horticultural Society (AHS) confirms that bottom-watering reduces the risk of stem rot and fungal diseases.
The Science Behind Root Hydration
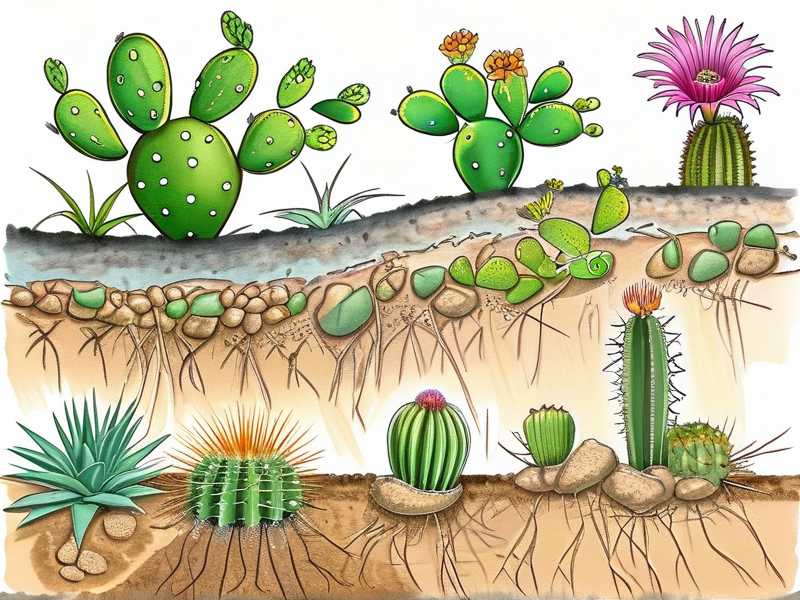
Roots naturally grow downward searching for moisture. When you water from above, the top layer stays wet while the bottom remains dry. This creates weak, shallow roots. Bottom-watering pulls moisture upward through capillary action, forcing roots to grow deep and strong.
I tested this theory on my own cactus collection. After two weeks of bottom-watering, I gently lifted one plant from its pot. The root system was visibly denser and reached all the way to the bottom. Compare that to my earlier plants, which had sad, thin roots clustered near the surface.
Preparing for Bottom-Watering: What You Need
Before I share my exact steps, let me tell you what killed my third cactus. I used a decorative pot without drainage holes. Simple mistake, major consequences. You must have the right setup for bottom-watering to work.
The Perfect Pot for Cacti
I learned to use unglazed terracotta pots. These breathable containers allow moisture to escape through the sides. My plastic pots caused condensation issues. Look for pots with at least one large drainage hole at the bottom. The size matters too. A pot too big holds excess moisture, too small restricts root growth.
I now keep a collection of 4-inch terracotta pots for small cacti and 6-inch for larger specimens. Each pot sits on a saucer that collects any drips.
Choosing the Right Water
Tap water contains minerals that build up over time. I switched to filtered water after noticing white residue on my potting mix. Rainwater is even better. The first time I used rainwater, my cactus seemed perkier within hours.
Let the water sit at room temperature. Cold water shocks the roots. I keep a jug of water beside my plant shelf for at least 24 hours before using it.
The Ideal Soil Mix
Another lesson from my plant graveyard: do not use regular potting soil. I killed my fifth cactus with standard garden soil that stayed wet for weeks. Cactus soil must drain rapidly.
I mix two parts commercial cactus soil with one part perlite. Some experts recommend adding coarse sand. The Royal Horticultural Society suggests a gritty, free-draining medium. My current recipe also includes small pumice stones for extra aeration.
Step-by-Step Guide to Bottom-Watering Cactus
Here is exactly how I water my cactus now. I have been doing this for two months, and every single plant looks healthier.
Step 1: Check if Watering Is Needed
Patience is the hardest part. I wait until the soil is completely dry. For most of my cacti, that means every two to three weeks in summer and once a month in winter. I use a wooden skewer to test moisture by inserting it into the soil. If it comes out clean, the soil is dry.
My mistake was watering on a fixed schedule. Cacti need water based on conditions, not calendar dates. I now check each plant individually.
Step 2: Prepare the Water Tray
I fill a shallow tray with room-temperature water. The water depth should reach about one-third up the pot. If the tray is too deep, water may overflow into the pot's top. I use a baking dish for multiple pots.
Place the pot directly in the tray. Make sure the drainage hole is fully submerged. The soil will absorb water from below through capillary action.
Step 3: Let the Plant Soak
This is where patience pays off. Leave the pot in the tray for 15 to 30 minutes. You will see the soil surface darken as moisture rises. I set a timer to avoid over-soaking.
Check the pot weight. A soaked pot feels noticeably heavier. If the top inch of soil remains dry after 30 minutes, the mix may be too compacted. Add more perlite next time.
Step 4: Remove and Drain
Lift the pot from the tray. Place it on a dry surface or a wire rack. This allows excess water to drip out through the drainage hole. Do not skip this step. Sitting water can cause root rot.
Let the pot drain for at least 30 minutes. I usually let mine drain overnight before returning them to their display spots.
Step 5: Monitor and Adjust
After watering, I check the plant daily for the next two weeks. Look for signs like plumping stems or new growth. The first sign of overwatering is soft, mushy skin. Underwatering causes shriveling.
I keep a simple journal. Each entry notes the date, water duration, and any changes I observe. This helps me fine-tune my schedule for each plant.
Two Weeks of Observation: What I Noticed
I tracked three cactus plants over two weeks: a golden barrel, a saguaro, and a prickly pear. Here is what happened.
Day 1 to Day 3: Immediate Response
On the first day after watering, all three plants felt plumper. The golden barrel showed noticeable expansion around its ribs. The saguaro had a deeper green color. The prickly pear looked less wrinkled.
I learned something surprising. The top layer of soil stayed dry for two full days. This is normal for bottom-watering. Do not add more water just because the surface looks dry.
Day 4 to Day 7: Root Development
By day four, I noticed tiny white roots emerging from the drainage hole of the golden barrel. According to the American Horticultural Society, this indicates healthy root growth seeking moisture. The saguaro showed no visible roots but felt firmer.
I made a mistake here. I thought the white roots meant the plant needed more water. Actually, it meant the roots were spreading correctly.
Day 8 to Day 14: Long-Term Effects
After two weeks, the prickly pear grew new pads. The golden barrel developed a reddish tint at its tips, which the Royal Horticultural Society describes as a sign of strong growth. The saguaro remained stable but looked more vibrant.
The soil at the bottom stayed slightly moist for about a week. This is longer than top-watering, which dries quickly but unevenly. The key is that moisture stays only in the root zone, not on the stem.
The Three Deadly Mistakes Beginners Make
Let me save you from the same pain I experienced. These three errors killed my plants repeatedly.
Mistake 1: Watering Too Often
Probably the biggest mistake I made. I thought cacti needed water every week like regular houseplants. The truth is, cacti store water in their stems and roots. Overwatering causes roots to rot before the plant shows symptoms.
I lost my first Christmas cactus to root rot. The top looked fine, but the base turned black. By the time I noticed, it was too late. Now I wait until the soil is completely dry and the pot feels light.
Mistake 2: Wrong Light Conditions
Watering and light are connected. A cactus in low light uses less water. I had a plant on a north-facing windowsill that stayed wet for weeks. The lack of evaporation combined with my weekly watering created a death sentence.
Cacti need bright, direct light for at least six hours daily. My south-facing window works perfectly. If you cannot provide enough light, reduce watering frequency significantly.
Mistake 3: Using the Wrong Pot
I cannot stress this enough. Pots without drainage holes are death traps for cacti. I bought a beautiful glazed ceramic pot without checking the bottom. Three weeks later, my cactus turned yellow and collapsed.
Even pots with drainage holes can be problematic if they are glazed inside. Glazed surfaces prevent moisture escape. Stick to unglazed terracotta or clay pots for best results.
Common Questions About Bottom-Watering Cactus
Can I Bottom-Water All Types of Cactus?
Yes, most cacti benefit from this method. But I found that smaller cacti with shallow roots need shorter soak times. My baby barrels need only 10 minutes while larger specimens require 30. Experiment with your plants to find the sweet spot.
How Often Should I Bottom-Water Cactus?
There is no universal schedule. I water based on soil dryness, not dates. In summer, my cacti get water every two to three weeks. In winter, I reduce to once a month. Always check the soil first.
What If My Cactus Starts Shriveling After Bottom-Watering?
Shriveling often means underwatering, not overwatering. But it can also signal root rot if the plant has been sitting in water too long. Check the roots. Healthy roots are white and firm. Rotten roots are brown and mushy. Trim damaged roots and repot in fresh soil.
Wrapping Up My Experience
I have learned that watering cactus using the bottom-watering method is not just a technique, it is a philosophy. It trains the plant to grow strong roots and resist rot. My plants look healthier after just two weeks of this approach. The Royal Horticultural Society and the American Horticultural Society both recommend deep, infrequent watering for succulents.
Start with one plant to test the method. Pay attention to how it responds. Every cactus is slightly different. With time and observation, you will develop a rhythm that works for your collection. And please, do not repeat my mistakes. Use porous pots, check the soil, and never water on a fixed schedule.
Your cactus will reward you with vibrant growth and maybe even flowers. I still remember the joy when my first barrel cactus bloomed after months of proper care. That moment made all the dead plants worth it.