 bluename
 How to Propagate Cactus Stem Cuttings in Indoor Controlled Environments
I’ve killed more cacti than I care to admit. My first attempt at propagating cactus stem cuttings ended with a mushy, rotting mess. I learned the hard way that indoor controlled environments are tricky. But here’s the straight answer: To propagate cactus stem cuttings indoors, use a sharp, sterile knife to cut a healthy segment, let it callus for 3-7 days in a dry, shaded spot, then plant it in a well-draining cactus mix with a pot that has drainage holes. Water sparingly—only after the soil is bone dry—and place it under bright, indirect light for 12-14 hours daily. After 2 weeks, you’ll see roots forming if you avoid overwatering and lighting errors. I’ve refined this method through trial and error, and now I’ll walk you through my real steps, mistakes, and fixes.
The 3 Deadly Mistakes Beginners Make with Cactus Cuttings
I remember my first cactus cutting. I was so excited. I watered it daily because I thought it needed moisture. Big mistake. Let me break down the three errors that kill most indoor cactus propagations. I’ve made all of them, and I’ve seen others do the same.
Mistake 1: Overwatering – The Silent Killer
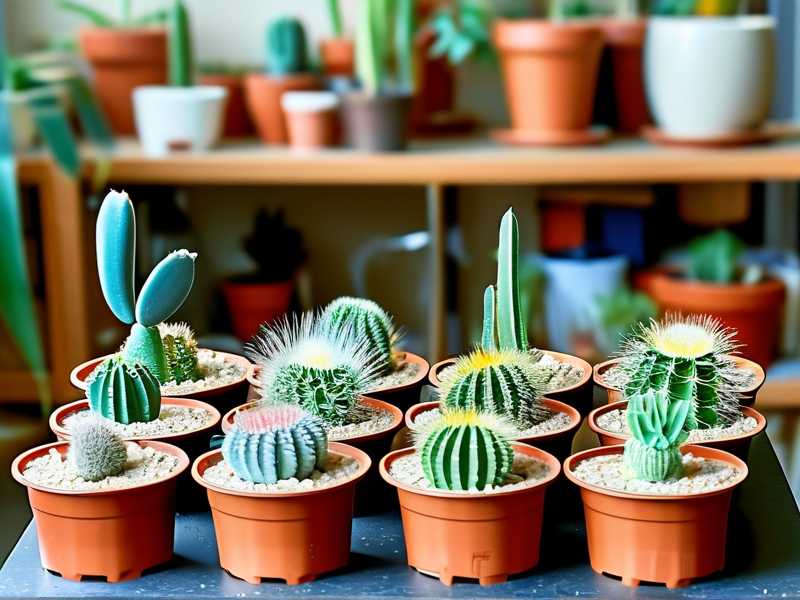
You’ve probably heard this before. But let me say it clearly: 90% of indoor plants die from overwatering. For cacti, it’s even worse. I once watered a cutting every two days. Within a week, the base turned brown and soft. I tried to save it, but it was too late. The rot spread from the cut end up into the stem. I learned that cacti store water in their tissues. They don’t need constant moisture. In fact, they thrive on neglect. My fix now? I wait until the soil is completely dry. I use a moisture meter to check. If it’s even slightly damp, I don’t water. I also make sure the pot has drainage holes. Without them, water pools at the bottom, and roots rot before they form.
Mistake 2: Lighting Misplacement – Too Much or Too Little
I thought cacti loved direct sunlight. So I placed my cutting on a south-facing windowsill. Three days later, the top turned yellow and shriveled. It got sunburned. Then I moved it to a dark corner. That was worse. The cutting stretched and became pale, like a sad, skinny ghost. I learned that cactus cuttings need bright, indirect light. Not direct sun, not darkness. My current setup uses a grow light with a timer. I set it for 14 hours a day. The light is about 6 inches above the cutting. It mimics the controlled environment of a greenhouse. If you don’t have a grow light, a east-facing window works. But rotate the pot every few days. Otherwise, one side gets more light, and the cutting grows crooked.
Mistake 3: Using the Wrong Pot – Size and Material Matter
I once used a big ceramic pot with no drainage holes. I thought it looked nice. The cutting sat in moist soil for weeks. No roots formed. Instead, the stem rotted from the bottom. I tried a plastic pot next. That was better, but the soil stayed wet too long. Now I use terracotta pots. They’re porous, so they wick away excess moisture. I also choose pots that are only slightly larger than the cutting. If the pot is too big, the soil holds too much water. The roots can’t spread fast enough to absorb it. My rule: use a pot that’s 2-3 inches wider than the cutting’s diameter. And always, always ensure drainage holes.
My Step-by-Step Process for Propagating Cactus Stem Cuttings Indoors
I’ve developed this routine over years of trial and error. It works for most common cacti, like prickly pear, barrel cactus, or Christmas cactus. I’ll share my exact steps, including the tools I use and the timeline I follow.
Step 1: Choosing the Right Cutting – Healthy and Clean
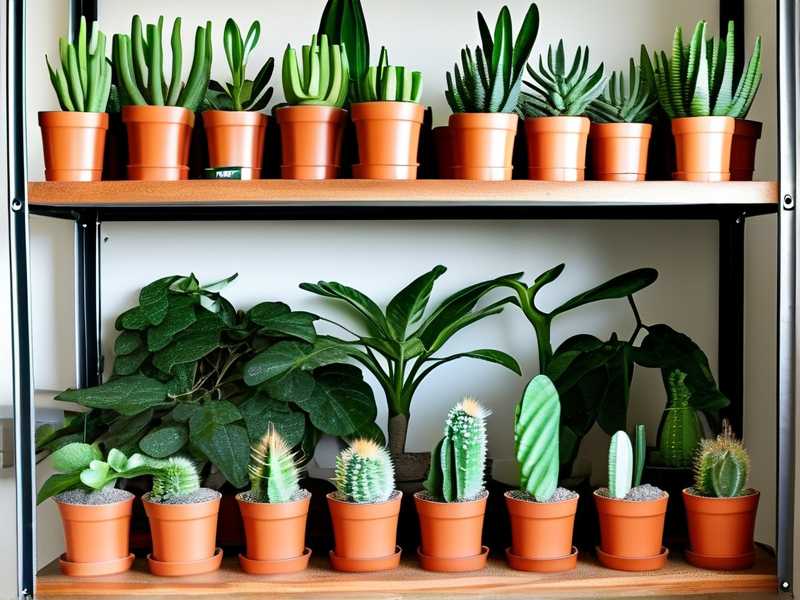
I start by selecting a mature, healthy stem. I look for a segment that’s firm, green, and free of spots or soft patches. I avoid any stem that looks wrinkled or discolored. I once took a cutting from a cactus that had a small brown spot. I thought it was fine. But the spot spread after I cut it. The whole cutting rotted within a week. Now I’m picky. I use a sharp, sterile knife. I wipe it with rubbing alcohol before each cut. I make a clean cut at a 45-degree angle, just above a joint. This increases the surface area for root growth. I also cut in the morning. The plant is hydrated, and the wound heals faster.
Step 2: The Callusing Phase – Patience is Key
This is where I messed up early on. I planted the cutting immediately after cutting it. The open wound sat in moist soil. It rotted within days. I learned that cacti need a callus to form over the cut end. This dry, hard layer prevents rot and infection. I now place the cutting in a dry, shaded spot for 3-7 days. The exact time depends on the cutting’s size. Small cuttings callus in 3 days. Larger ones take up to 7 days. I set the cutting on a paper towel or a clean tray. I don’t put it in soil yet. I check the cut end daily. When it’s dry and hard to the touch, it’s ready. I also make sure the air is dry. In my indoor controlled environment, I use a dehumidifier if the humidity is above 60%. High humidity delays callusing and invites rot.
Step 3: Planting the Cutting – Proper Depth and Soil
I prepare the pot first. I fill it with a cactus mix. I used to use regular potting soil, but it holds too much water. Now I buy a commercial cactus mix or make my own: 2 parts potting soil, 1 part coarse sand, and 1 part perlite. This ensures good drainage. I also add a small layer of gravel at the bottom of the pot. This prevents water from pooling. I make a small hole in the center of the soil using a pencil or my finger. I gently place the callused end of the cutting into the hole. I don’t push it too deep. About 1-2 inches deep is enough. The cutting needs to stand upright. I fill the hole with soil and pat it lightly. I don’t water it immediately. I wait 2-3 days. This gives the callus time to settle. When I do water, I use a spray bottle. I mist the soil lightly, not the cutting. Overwatering at this stage is the biggest risk.
Step 4: Light and Temperature – Creating the Perfect Environment
I place the pot in a location with bright, indirect light. My east-facing windowsill works well. If I don’t have enough natural light, I use a grow light. I set it for 12-14 hours a day. The light should be about 6-8 inches from the cutting. I also use a thermometer. The ideal temperature for cactus propagation is between 70-80°F (21-27°C) during the day. At night, it can drop to 60-65°F (15-18°C). I avoid placing the pot near drafts or air conditioning vents. Cold air slows root growth. I also avoid heaters. They dry out the air too much. I monitor the humidity. Cacti prefer low humidity, around 30-40%. If my home is humid, I use a dehumidifier or place the pot in a dry room.
Step 5: The First 2 Weeks – Monitoring and Adjusting
This is the critical period. I check the cutting daily. I look for signs of rot, like softness or discoloration. I also check the soil. I only water when the soil is completely dry. I use a moisture meter to confirm. I don’t fertilize during this time. The cutting doesn’t need nutrients. It’s focusing on root development. I also rotate the pot every few days. This ensures even light exposure. After 2 weeks, I gently tug the cutting. If it resists, roots are forming. I’ve seen tiny white roots at the base of the cutting after 14 days. This is a good sign. I continue with the same care for another 2-4 weeks. Once the roots are 1-2 inches long, I start treating it like a mature cactus.
My Real-Life Observations Over 2 Weeks
I want to share what I actually saw during a recent propagation. I used a prickly pear cactus cutting. Here’s my daily log.
Days 1-3: The Callusing Phase
I cut the segment on day one. I placed it on a paper towel in a shaded spot. The air was dry, around 40% humidity. On day two, the cut end looked slightly dry. By day three, it was completely hard. I didn’t water or touch it. I just let it sit.
Days 4-7: Planting and First Watering
On day four, I planted the cutting in a terracotta pot with a cactus mix. I waited 2 days before watering. On day six, I misted the soil lightly. The cutting looked fine. No signs of trouble. I kept the pot in bright, indirect light under a grow light for 14 hours daily.
Days 8-14: Root Development
On day eight, I checked the soil. It was dry. I misted again. On day ten, I saw a tiny white root at the base of the cutting. I was excited. By day 14, I could feel resistance when I tugged gently. The root was about 1 inch long. I didn’t water more than once every 4 days. The cutting stayed firm and green. No rot.
Common Mistakes I Still See Others Make
I’ve watched friends and online forums make the same errors I did. Here are a few more pitfalls.
Mistake 4: Cutting Too Large or Too Small
I once tried to propagate a giant segment. It was 8 inches long. It took forever to root. The cutting used all its energy to stay upright. It never developed strong roots. I now use segments that are 3-5 inches long. Smaller cuts root faster. But don’t go too small. A 1-inch cutting might not have enough stored energy.
Mistake 5: Ignoring Seasonal Timing
I tried to propagate in winter. The air was cold, and the light was low. The cutting took 6 weeks to root. In summer, it takes 2-3 weeks. I now propagate in spring or early summer. The growth hormones are active. The days are longer. If you must propagate in winter, use a grow light and a heat mat. The heat mat keeps the soil warm, around 70-75°F. I’ve had success with this method.
Mistake 6: Overfertilizing Too Early
I added a liquid fertilizer to the water after 2 weeks. The cutting developed a white crust on the soil. The roots burned. I learned that cacti don’t need fertilizer until they’re established. I wait at least one month after rooting. Then I use a diluted, low-nitrogen fertilizer. It’s better to underfeed than overfeed.
Expert Tips from RHS and AHS
I’ve read a lot of research. The Royal Horticultural Society (RHS) recommends using a sterile knife and letting the cutting callus for at least 3 days. They emphasize that cacti store water, so overwatering is the main cause of failure. The American Horticultural Society (AHS) suggests using a terracotta pot for indoor propagation. The porous material prevents waterlogging. These experts confirm what I’ve learned through mistakes. I’ve also found that a controlled environment, with consistent light and temperature, boosts success rates. RHS and AHS both agree that cacti need bright, indirect light during propagation. Direct sun can burn the cutting.
Frequently Asked Questions
Q1: How long does it take for a cactus cutting to root indoors?
It usually takes 2-4 weeks for roots to form. Small cuttings root faster. Larger cuts can take 6 weeks. I’ve found that a warm, dry environment speeds up the process. If you use a heat mat, you can see roots in 2 weeks. But don’t rush. Let the cutting tell you when it’s ready.
Q2: Can I propagate a cactus cutting in water?
I’ve tried it. It’s not ideal. Cacti are adapted to dry conditions. Water propagation can lead to rot. The roots formed in water are different from soil roots. When you transplant, the cutting might struggle. I stick to soil propagation. It’s more reliable.
Q3: What should I do if my cactus cutting starts to rot?
Remove the cutting immediately. Cut off the rotted part with a sterile knife. Let the healthy part callus again for 3-5 days. Then repot it in fresh, dry soil. I’ve saved a few cuttings this way. But if the rot is extensive, it’s better to discard it. Prevention is key. Don’t overwater.
I’ve been propagating cactus stem cuttings for years. It’s a rewarding process once you get the hang of it. The key is patience. Don’t water too often. Don’t place it in direct sun. Use a small pot with drainage. I’ve killed my share of plants, but I’ve also grown dozens of new cacti from cuttings. It’s a skill that takes practice. If you follow these steps, you’ll see roots forming in 2 weeks. Your indoor controlled environment will be perfect for propagation. Just remember: less is more. Cacti thrive on neglect.





