bluename
How to Select Containers with Adequate Drainage Holes for Outdoor Cactus
Let me save you three years of trial and error right at the start.
If you want your outdoor cactus to thrive, pick a pot with at least one drainage hole that's a quarter-inch or wider, use a gritty mix that drains in seconds, and never let the container sit in a saucer of standing water. That's it. That's the whole game.
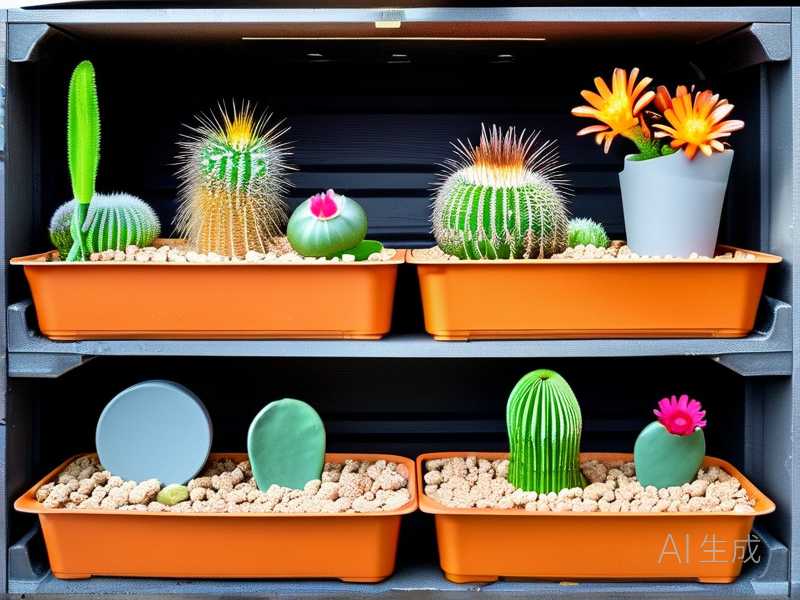
I've killed seven cacti learning this. Seven. The first one drowned in a beautiful ceramic pot with no holes because I thought "cactus soil" alone would save it. It didn't. The second one rotted from the bottom up in a glazed container that held water like a bathtub. By the time I noticed the mushy base, it was already too late.
So when people ask me how to choose the right container for outdoor cactus, I don't give them a list of pretty pots. I tell them what actually keeps the plant alive.
Why Drainage Holes Matter More Than You Think
Cactus roots are built for desert conditions. They grab water fast when rain comes, then they want to dry out completely. When water can't escape, those roots sit in moisture. Bacteria move in. Rot follows.
The Royal Horticultural Society (RHS) puts it plainly: poor drainage is the number one killer of container-grown succulents and cacti. I've linked to their site because their guidance saved more of my plants than any YouTube video ever did — https://www.rhs.org.uk
You'll hear the statistic everywhere, and it's true: 90% of indoor plants die from overwatering. Outdoor cactus in containers face the same risk, especially during rainy seasons or if you water on a fixed schedule instead of checking the soil first.
What to Look For in a Cactus Container
I used to think any pot with a hole would work. Then I tried a tiny hole — maybe an eighth of an inch — and watched water pool on the surface for a full minute before it drained. That's not drainage. That's a slow leak.
Here's what I check now:
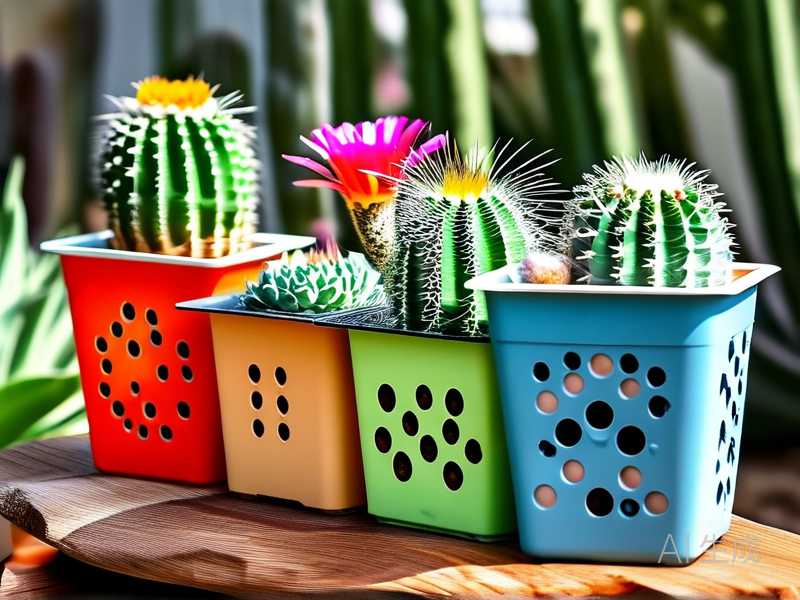
Hole size and number. One hole the size of a pencil eraser is the minimum. I prefer three to five smaller holes spaced across the bottom. More holes mean faster drainage and less chance of clogging.
Material matters. Terracotta breathes. Unglazed clay wicks moisture away from the soil, which helps prevent rot. Glazed ceramic looks nice but traps moisture. Plastic is lightweight and cheap but doesn't breathe at all. I use terracotta for most of my outdoor cactus and reserve glazed pots for established plants that I've learned to water carefully.
Size relative to the plant. A pot that's too big holds too much soil, and that soil stays wet for too long. I made this mistake with a small Mammillaria in a giant bowl. The roots never reached the wet edges, but the center stayed damp for weeks. The plant shriveled anyway because the roots couldn't access the moisture, and the stagnant soil bred fungus.
The rule I follow: the pot should be about one to two inches wider than the root ball. That's it. Cactus actually prefer being slightly root-bound.
Drainage accessories that actually help
I've tried rocks at the bottom of pots. Skip that. It doesn't improve drainage — it just raises the water table. What works is a simple mesh screen over the holes to keep soil from washing out, plus pot feet or bricks to lift the container off the ground so air can circulate underneath.
My 2-Week Container Test
Here's a routine I've used for the past two years. I call it the two-week container test.
Week 1: I plant the cactus in my chosen container using a mix of 60% pumice or perlite, 30% coarse sand, and 10% organic potting soil. I water thoroughly until water runs out the bottom. Then I wait.
Week 2: I check the soil every three days. If the top two inches are dry by day five or six, the drainage is working. If the soil is still damp on day ten, the container isn't draining well enough. I either repot into something with better drainage or adjust my soil mix.
I did this with a Cleistocactus in a plastic pot with two small holes. By day nine, the soil was still wet. I moved it to terracotta with five holes. By day five, dry. The cactus has been happy for eighteen months now.
The Three Mistakes That Kill Most Beginner Cactus
I've made all three. Most people do.
Mistake 1: Overwatering. This is the big one. Cactus don't need water on a schedule. They need water when the soil is completely dry. In summer, that might be every ten days. In winter, once a month or less. If you're watering every week because it's "watering day," you're probably killing your plant.
Mistake 2: Wrong light. Cactus need full sun. Not bright indirect light. Not a windowsill that gets three hours of morning sun. Full. Sun. If they don't get enough, they stretch out — etiolation, it's called — and become weak and pale. But too much sun too fast can scorch them. I burned a beautiful Ferocactus by moving it from shade to full sun in one afternoon. Acclimatize over two weeks, an hour or two more sun each day.
Mistake 3: Wrong pot. No drainage hole, wrong size, wrong material. Any of these can kill a cactus that's otherwise perfectly cared for.
Soil and Repotting
I use my own mix now. Equal parts pumice, coarse sand, and a cactus-specific potting soil. Some people add a handful of charcoal. I've tried it. Can't tell the difference, honestly.
Repot every two to three years, or when roots start circling the bottom. Spring is best. Water lightly a few days before repotting to reduce shock. Shake off old soil gently, check for root rot, trim any brown mushy roots with sterilized scissors, and let the plant sit in a dry, shaded spot for a day or two before planting in fresh mix.
Don't water immediately after repotting. Wait a week. This gives damaged roots time to callous over.
Light, Water, and Fertilizer Basics
Outdoor cactus want at least six hours of direct sun. If you live somewhere with brutal afternoon heat — like Arizona or parts of Australia — some afternoon shade is fine. Morning sun is gentler and still strong enough.
Water deeply but infrequently. Soak the soil until water runs out the drainage holes. Then don't water again until the soil is bone dry. During rainy seasons, move containers under cover or bring them indoors if you can.
Fertilize lightly. I use a cactus-specific fertilizer diluted to half strength, once in spring and once in midsummer. That's it. More than that and you get soft growth that attracts pests. Don't fertilize in winter. Don't fertilize a plant that's stressed or recently repotted.
Seasonal Care for Outdoor Cactus in Containers
Spring
This is wake-up time. I start watering more frequently as soon as I see new growth. I repot if needed. I fertilize once. I check for pests that have overwintered. I also slowly introduce plants back to full sun if they've been protected all winter.
Summer
Water when dry. Watch for sunburn on unusually hot days. Make sure containers aren't sitting in water after storms. I check drainage holes weekly — sometimes they get clogged with soil or roots. Pests love warm weather, so I inspect new growth for mealybugs and spider mites.
Fall
Back off on water. Stop fertilizing by early fall. If nights get cold, prepare to move containers indoors or into a greenhouse. Clean up any dead or dying pads or stems. This is also a good time to check if roots are crowding the pot.
Winter
This is the danger zone. Wet cold kills cactus faster than dry cold. I stop watering almost entirely — maybe once a month if the plant looks shriveled. I keep containers in a cool, dry place with as much light as possible. An unheated garage or a sunny indoor room works. Don't fertilize. Don't repot. Just let them rest.
Pests and Problems
Mealybugs look like tiny cotton balls. I remove them with a cotton swab dipped in rubbing alcohol. Spider mites are harder to see — they leave fine webs and cause speckled, yellowing patches. I spray with insecticidal soap and increase humidity slightly (just around the plant, not the soil).
Root rot is the worst. It starts at the base and works up. By the time you see dark mushy spots, you're often too late. If you catch it early, cut away the rot, let the healthy part callous, and reroot in fresh dry mix. I've saved maybe two plants this way out of ten.
Yellowing usually means too much water or not enough light. Shriveling usually means not enough water — but if the soil is wet and the plant is shriveling, that's root rot.
FAQ
Do I really need drainage holes, or can I just use rocks at the bottom?
You need drainage holes. Rocks don't create drainage — they just create a reservoir for water to sit in. I've tried both. Rocks failed every time.
Can I use a pot without holes if I'm very careful with watering?
You can, but it's like driving without a seatbelt. You might be fine for years. Or you might hit one rainy week and lose everything. I use pots with holes for all my outdoor cactus, no exceptions.
How often should I water my outdoor cactus in summer?
Check the soil first. If the top two inches are dry, water deeply. In my climate, that's about every ten to fourteen days in summer. In winter, once a month or less. Your conditions will vary — trust the soil, not a calendar.
The American Horticultural Society (AHS) has a great resource on container gardening that aligns with everything I've learned the hard way — https://ahsgardening.org
At the end of the day, the container is the foundation. Get that right — good drainage holes, proper size, breathable material — and everything else gets easier. Get it wrong, and no amount of careful watering will save your cactus. Trust me. I learned that lesson seven times over.