 bluename
 How to Propagate Cactus Offsets in Outdoor Soil During Warm Spring Months
I killed my first three cactus plants before I figured out how to propagate cactus offsets properly. The answer is simple: let the offset callus for 3-5 days, plant it in dry, well-draining outdoor soil mix, and don't water it for at least two weeks. Most people drown their offsets before they even root. Here's the real deal.
Why Spring Is the Golden Window for Offsets
Spring is the season when cacti wake up from their winter dormancy. The soil warms up, and the days get longer. I learned this the hard way. I tried propagating offsets in autumn once. Big mistake. The cold soil rotted everything within a week.
According to the RHS (Royal Horticultural Society), cactus propagation works best when daytime temperatures stay consistently above 60°F (15°C). I always check my local weather forecast for a solid two-week window of warm days before I even touch my pruning shears.
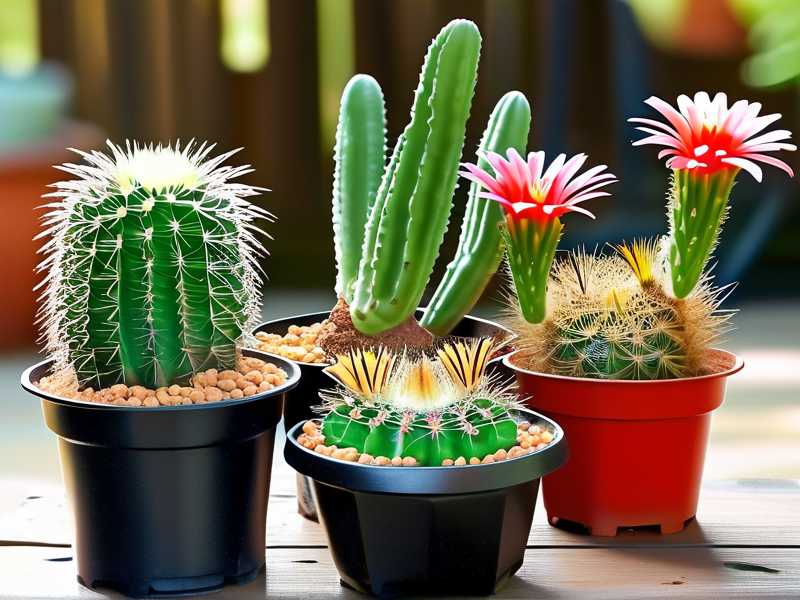
The warm spring months give offsets the best chance to develop roots before the intense summer heat hits. Think of it this way. Offsets are like baby plants. They need gentle conditions, not extreme temperature swings.
My 2-Week Step-by-Step Propagation Process
Week 1: Preparation and Planting
Day 1: Choosing the Right Offsets
I walk through my garden every morning during spring. I look for offsets that are at least one-third the size of the mother plant. Honestly, smaller ones rarely survive. I've tried. I wasted an entire month nursing tiny pea-sized offsets that just shriveled up.
You want offsets that have a firm base. Squeeze them gently. If they feel soft or mushy, leave them alone. Those are already rotting from the inside.
Day 2: Clean Separation
I use a sterilized knife. This is non-negotiable. I once used dirty scissors and introduced bacteria to the cut. The whole offset turned black in three days. Now I wipe my blade with rubbing alcohol before every cut.
I twist the offset gently away from the mother plant. If it doesn't come off easily, I cut it cleanly. Always leave a tiny bit of the connecting tissue on the offset. That's where the roots will emerge.
Day 3: The Callusing Phase
Here's where most beginners mess up. You cannot plant offsets immediately. I learned this after losing five offsets in one go. I planted them straight into damp soil. They rotted within 48 hours.
I place my offsets on a dry paper towel in a shaded spot. I leave them there for 3-5 days. The cut end needs to dry out completely. You'll see a white or light brown callus form. That's your signal that the wound is sealed.
Day 5: Planting in Outdoor Soil
I prepare my outdoor soil mix. Regular garden soil is too heavy. I mix 50% coarse sand, 30% perlite, and 20% potting soil. This creates the drainage that cactus roots crave.
I dig a small hole in the soil. I place the offset on top. I don't bury it deep. The base should just touch the soil surface. I gently press the soil around it.
Day 6-7: No Watering
This is the hardest part for me. I want to water my new plants. But I resist. The offset needs to develop roots first. Watering now would just invite rot.
Week 2: Observation and Adjustments
Day 8: First Signs of Life
I check my offsets every morning. I look for slight color changes. Healthy offsets stay green and firm. If they turn yellow or become soft, something is wrong.
I've noticed that offsets in full shade take longer to root. But full sun burns them. I aim for morning sun and afternoon shade. This balance works perfectly.
Day 9: The Root Check
I gently tug on an offset. If there's resistance, roots are forming. I don't pull hard. I just give a tiny wiggle. Resistance means progress.
I lost one offset because I kept checking it. I disturbed the new roots. Now I check only every other day.
Day 10: First Watering
I finally water my offsets. But I don't soak the soil. I use a spray bottle to mist the surface lightly. This provides just enough moisture without drowning the roots.
Day 11-12: Monitoring for Rot
I check the base of each offset. Signs of rot include black spots, soft texture, or a bad smell. I remove any affected offsets immediately. I quarantine them away from healthy plants.
Day 13: Gradual Sun Exposure
I increase sun exposure slowly. I move offsets from shade to partial sun. I watch for sunburn. White or brown patches on the skin mean too much sun too fast.
Day 14: Celebration
By day 14, my offsets have visible root growth. I see tiny white roots emerging from the callused base. I water them normally now. I wait for the soil to dry completely between waterings.
The 3 Deadly Mistakes Newbies Make
Mistake 1: Overwatering
I cannot stress this enough. 90% of indoor plants die from overwatering. Cactus offsets are even more sensitive. They have no roots to absorb water. Soaking them just drowns them.
I killed my first offsets by watering them daily. I thought they needed constant moisture. Dead wrong. Cactus offsets want bone-dry soil for at least the first week.
The fix: Wait until the soil is completely dry before watering. Use a moisture meter if you're unsure. Stick your finger an inch into the soil. If it's dry, you can water.
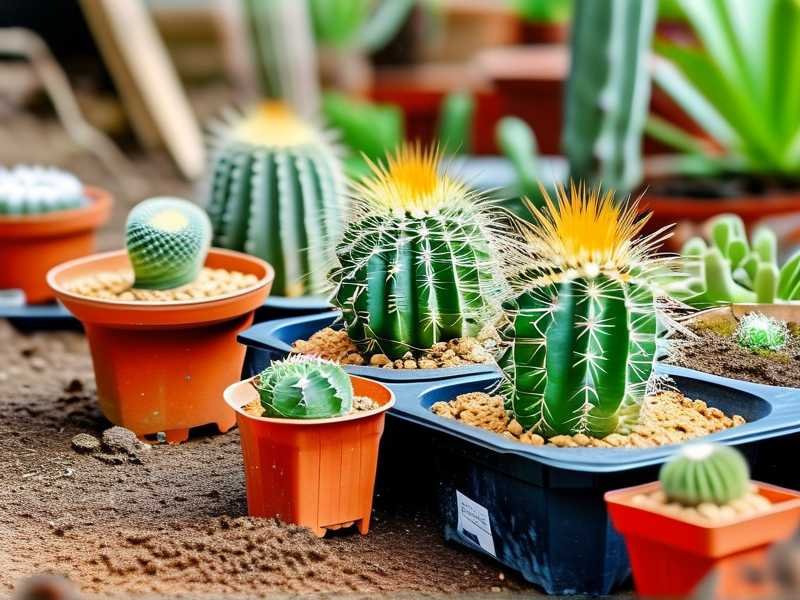
Mistake 2: Wrong Light Placement
I put my offsets in full sun once. They turned white and shriveled within three days. That's sunburn. Offsets are delicate. They need filtered light until they establish roots.
After they root, I gradually increase sun exposure. I move them to a spot with morning sun and afternoon shade. This prevents leaf burn while providing enough light for growth.
The fix: Start with bright indirect light. Move to partial sun after two weeks. Full sun only after the offset has grown new pads or leaves.
Mistake 3: Using the Wrong Pot
I planted offsets in a beautiful ceramic pot once. No drainage holes. The water pooled at the bottom. The roots rotted within a week. I felt terrible.
Terracotta pots are my go-to now. They breathe. They wick away excess moisture. Plastic pots trap water. Avoid them unless you're a very experienced gardener.
The fix: Always use pots with drainage holes. Terracotta is best. If you must use plastic, add extra perlite to the soil mix.
Personal Lessons from My Cactus Failures
I have a confession. I've killed more cactus offsets than I've successfully propagated. My first batch of ten offsets, only two survived. I was heartbroken. But I learned.
I tried propagating offsets in winter because I was impatient. The cold soil stopped all growth. The offsets just sat there, slowly rotting. I waited four months for nothing.
I also tried using fertilizer on new offsets. Big mistake. The chemical salts burned the tender root tips. I now wait at least two months before fertilizing.
The American Horticultural Society (AHS) recommends using a balanced fertilizer at half strength. I follow this advice. It works.
Another lesson. I don't crowd my offsets. I used to plant them close together in a single pot. They competed for resources. Some grew faster and shaded the others. Now I give each offset its own space.
Soil Mix Secrets for Success
I've experimented with dozens of soil combinations. Here's what works best for outdoor cactus offsets.
Base mix: 2 parts coarse sand, 1 part perlite, 1 part organic potting soil. This drains quickly but holds enough moisture for root development.
Additions: I sometimes add crushed granite or pumice. These improve drainage further. I avoid vermiculite. It holds too much water.
pH balance: I test my soil pH. Cactus prefer slightly acidic soil, around 6.0 to 6.5. I add a little sulfur if the pH is too high.
I learned this after a soil test showed my garden soil was alkaline. My offsets struggled. Once I adjusted the pH, they thrived.
Common Pests and Problems
Spring brings out pests. I've dealt with mealybugs, scale, and spider mites. These pests love new growth.
Mealybugs: I spot them as white cottony masses. I remove them with a cotton swab dipped in alcohol. I check my offsets weekly.
Scale: These look like brown bumps on the cactus skin. I scrape them off gently. I apply neem oil as a preventive measure.
Fungal issues: Wet soil causes fungal problems. I see black spots on the cactus base. I remove affected parts immediately. I let the soil dry out completely.
I keep my offsets spaced apart. Good air circulation prevents fungal growth. I also avoid overhead watering. Water on the cactus body can cause rot.
How to Know When Offsets Are Ready for Transplant
I watch for specific signs. Healthy offsets have firm, green skin. They resist gentle tugging. Roots are visible at the base.
I wait until the offset has grown new pads or leaves. This shows it's established. I usually transplant after two to three months.
I dig around the offset carefully. I lift it with the root ball intact. I plant it in its permanent location. I water it in well.
The transition period is critical. I keep the transplanted offset in partial shade for a week. This reduces transplant shock.
Seasonal Care for Propagated Offsets
Spring: Focus on establishing roots. Water sparingly. Provide morning sun.
Summer: Increase watering as the offset grows. Protect from intense afternoon sun. I use shade cloth when temperatures exceed 90°F (32°C).
Autumn: Reduce watering gradually. The cactus prepares for dormancy. I stop fertilizing by September.
Winter: I move my outdoor offsets to a sheltered location. I cover them with frost cloth if temperatures drop below freezing. I water only once a month.
I learned this after losing an entire collection to a surprise frost. Now I'm prepared.
Frequently Asked Questions
Q: Can I propagate cactus offsets in regular garden soil?
No, regular garden soil is too heavy. It retains too much water. Cactus offsets need well-draining soil. Mix sand, perlite, and potting soil for best results.
Q: How long does it take for cactus offsets to root?
Roots typically appear within two to four weeks. Some species take longer. Patience is key. Don't disturb the offsets while they're rooting.
Q: Should I water cactus offsets immediately after planting?
No, wait at least one week before watering. The offset needs time to callus and develop roots. Watering too early causes rot. I wait until the soil is completely dry.
Final Thoughts on Propagating Cactus Offsets
I've been propagating cactus offsets for five years now. I still make mistakes. But I've learned to trust the process. Spring is the best time. Dry soil is essential. Patience is non-negotiable.
I remember my first successful propagation. Six offsets, all rooted and growing. I felt like a gardening superhero. You can achieve the same results.
Start with a few offsets. Practice on easy species like Opuntia or Echinopsis. Build your confidence. Before you know it, you'll have a garden full of thriving cactus plants.
Remember, 90% of indoor plants die from overwatering. Don't be part of that statistic. Let your offsets dry out. Give them the right light. Use the right soil. Your cactus offsets will thank you.
I still have the surviving two offsets from my first batch. They're now three feet tall and blooming every spring. They remind me that mistakes are just lessons in disguise. Happy propagating.





