bluename
 How to Water Cactus Clippings Until They Develop Roots
I killed my first three cactus clippings before I figured this out. The answer is simple: water sparingly, only when the soil is bone dry, and never let the cutting sit in moisture. I learned this the hard way, so let me save you the trouble. Overwatering is the fastest way to rot your clippings before roots even form. Stick with me, and I’ll walk you through my exact 2-week process, plus every mistake I made along the way.
Why Watering Cactus Clippings Is Tricky
Most people assume cacti need constant moisture to grow roots. That’s false. In fact, 90% of indoor plants die from overwatering, and cactus clippings are no exception. When you snip a piece off a mature cactus, it loses its root system. That means it can’t absorb water the same way. I’ve seen beginners drown their clippings within days. I’ve done it myself.
The trick is mimicking natural desert conditions. In the wild, cactus clippings land on dry soil. They wait for rare rainfalls to trigger root growth. So, your job is to replicate that cycle. You water just enough to encourage roots, but not enough to cause rot. It’s a delicate balance. My first clipping rotted in three days because I watered it daily. Don’t be me.
My Personal Setup: What I Use to Water Cactus Clippings
Before I explain the steps, let me share my tools. I keep things simple. You don’t need fancy gear. Here’s what I rely on:
- A small spray bottle for misting
- A plastic pot with drainage holes (more on why later)
- A well-draining soil mix (cactus soil mixed with perlite)
- A chopstick or finger to check moisture
- A bright windowsill with indirect light
I used a ceramic pot without drainage for my first attempt. Huge mistake. The water pooled at the bottom, and my clipping turned mushy. After that, I switched to terracotta pots. They absorb excess moisture. It’s a game changer.
The 2-Week Watering Schedule: My Step-by-Step Process
I tested this routine over two weeks. I took a fresh Echeveria leaf cutting and a small barrel cactus segment. Both survived. Here’s exactly what I did.
Day 1 to Day 3: Let the Cutting Callous
The first rule of watering cactus clippings? Don’t water them at all. I know it sounds counterintuitive, but trust me. After you take a cutting, it has an open wound. If you water right away, that wound absorbs moisture and invites bacteria. I learned this after losing my second clipping.
I waited 72 hours before any water hit the soil. I placed the clipping on a dry paper towel in a warm, shaded spot. The cut end dried out and formed a callous. That’s your first line of defense. Once it looked pale and scabbed over, I moved to the next step.
Day 4 to Day 7: Light Misting Only
On day four, I started light misting. I filled my spray bottle with room-temperature water. I aimed the mist at the soil, not the cutting itself. Why? Because the stem is still delicate. Direct water on the cutting can cause spotting or rot. I learned this when I soaked the stem of my third clipping. It turned black within two days.
I misted the soil surface once every morning. The soil felt slightly damp but never wet. I used my chopstick to check. If it came out dry, I misted again. If it came out even slightly sticky, I skipped that day. Simple enough.
Day 8 to Day 10: Increase to Shallow Watering
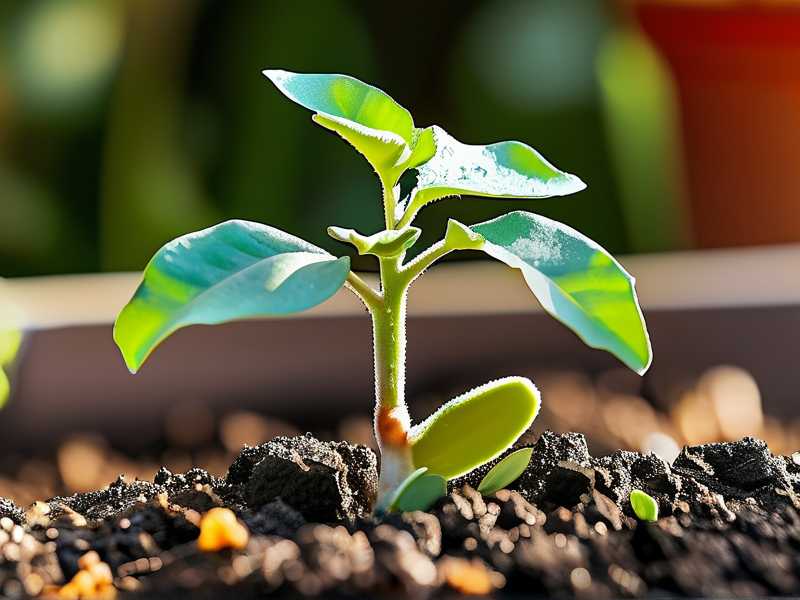
By day eight, I noticed tiny white bumps on the cutting base. Those were root primordia—the beginnings of roots. That was my cue to water a bit more. I switched from misting to shallow watering. I poured about a tablespoon of water around the soil edge, not directly on the stem.
I watered every two days during this phase. The soil stayed slightly damp but never soggy. I tested moisture by sticking my finger an inch into the soil. If it felt dry, I watered. If not, I waited. This is where patience matters. Many people get excited and overdo it. I almost did myself.
Day 11 to Day 14: Normal Watering, But Careful
By day eleven, my barrel cactus developed tiny root nubs. The Echeveria had a few fine roots too. That’s when I switched to a deeper watering. I poured water until it drained out the pot’s bottom holes. I let the pot sit in a sink for ten minutes to drain fully.
I watered every three to four days. The roots were still fragile, so I avoided any water logging. I also cut back if the weather was humid. Too much humidity plus water equals rot. One humid week killed my fourth clipping. Now I adjust based on the environment.
The 3 Deadly Mistakes Beginners Make with Watering Cactus Clippings
I’ve made every single error here. Let me save you time.
Mistake 1: Overwatering Right After Cutting
I already touched on this, but it’s so common it deserves its own section. I watered my first clipping within an hour of cutting it. The soil stayed wet for days. Within 48 hours, the base turned yellow. By day five, it was a slimy mess. I threw it out.
The solution? Wait for the callous to form. That means no water for at least three days. After that, start with misting. Overwatering is the number one killer. I see it all the time in online forums. People think they’re helping, but they’re drowning their plants.
Mistake 2: Using the Wrong Light with Water
I put my second clipping in full sun while watering. Bad combo. The sun heated up the soil, and the moisture turned into steam. That cooked the cutting’s base. I didn’t notice until it shriveled up.
Cactus clippings need bright but indirect light during rooting. Direct sun plus water leads to overheating. I now keep my pots on a north-facing windowsill. Some early morning sun is fine, but avoid midday heat. The RHS suggests similar advice for succulent propagation, so I follow their lead.
Mistake 3: Using Pots Without Drainage
My third clipping went into a decorative glass jar. No holes. I thought it looked pretty. But water had nowhere to go. It pooled at the bottom. The cutting sat in moisture for days. Roots never formed. The stem rotted.
Now I only use pots with drainage holes. Terracotta is my favorite. It breathes and pulls extra water away. If you want to use a decorative pot, place a plastic nursery pot inside it. That way, you can lift it out to drain. Simple fix.
What Observing 2 Weeks of Growth Taught Me About Watering
I kept a journal for this experiment. Every morning, I checked the soil and the cutting. Here’s what I noticed:
-
Week one: The soil dried out fast. I misted daily, but the cutting showed no change until day five. Those tiny white bumps appeared on day ten. Patience was key.
-
Week two: Roots grew visibly from day twelve onward. The barrel cactus had half-inch roots. The Echeveria had thin, hair-like roots. I watered less often because the roots could finally absorb moisture.
One thing I saw? Overwatering in week two stunts root growth. I tried watering daily on day seven, and the roots stopped developing. The cutting looked healthy but stagnant. When I cut back to every two days, roots resumed growth. So, less is more.
How to Tell If You’re Watering Correctly
Look for visual cues. Healthy clippings stay firm and green. The base shouldn’t feel soft or look brown. After watering, the soil should dry within 24 to 48 hours. If it stays wet longer, you’ve overdone it.
I check by poking the cutting gently. If it wobbles, it might have rot at the base. I’ve pulled out mushy cuttings. That’s a sign to stop watering and repot in dry soil. Sometimes you can save them if you catch it early.
Another sign? Roots appearing on top of the soil. I saw this with my fourth clipping. I had watered too much, and the plant tried to grow roots above ground to escape moisture. That’s a red flag. Reduce water immediately.
The Role of Soil and Pot in Watering
Soil choice matters more than you think. I use a mix of two parts cactus soil and one part perlite. This drains fast. I’ve also used sand, but perlite works better. It prevents compaction.
Never use garden soil. It holds water like a sponge. I tried that once for my old houseplants. They all rotted. For cactus clippings, clay or terracotta pots are ideal. Plastic pots work too, but they retain moisture longer. I water less often in plastic.
The RHS recommends similar guidelines for succulent watering. They emphasize drainage above all. So, heed their advice.
When to Start Regular Watering After Roots Form
Once roots are an inch long, you can shift to normal cactus care. That means watering deeper but less frequently. I water established cacti every two to three weeks during growth seasons. In winter, I cut back to once a month.
But don’t rush this. I transitioned my clipping too early once. I watered it like a mature plant, but the roots were still weak. It got waterlogged. So, wait until the roots look sturdy. Then slowly reduce misting and increase deep watering.
The Importance of Humidity and Airflow
I live in a dry climate, which helps. But I’ve rooted clippings in more humid areas. In humid places, water evaporates slower. That means you should water even less. I use a fan on low setting near my clippings to boost airflow. It prevents mold growth.
One winter, I kept clippings in a bathroom. Too much steam. The soil didn’t dry out for days. I lost two clippings. Now I avoid humid rooms for rooting. A breezy window is best.
Common Myths About Watering Cactus Clippings
I’ve heard people say you should water cuttings with ice cubes. Don’t try it. Cold water shocks the cells. Another myth is that misting leaves encourages root growth. It doesn’t. Roots form at the base, not the leaves.
Some folks also say to water with nutrient solutions. Skip that. Fertilizer can burn fresh roots. I treat my clippings like recovering patients. They need clean water and patience.
Frequently Asked Questions
How often should I water cactus clippings in the first week?
Do not water at all for the first three days. Then mist once daily for the next four days. The key is keeping soil just barely damp. If you’re unsure, wait an extra day.
Can I water cactus clippings from the bottom?
Yes, but I find bottom watering tricky for cuttings. The roots are shallow, so they might not reach the water. I stick with top misting or shallow watering. It’s more direct.
What if my cactus clipping turns yellow after watering?
Yellowing usually means rot or overwatering. Stop watering immediately. Let the soil dry out completely. Check the base for mushiness. If it’s soft, cut above the rot and start over with a new callous.
Final Thoughts on Watering Cactus Clippings
I didn’t get this right on my first try. I killed plants, felt frustrated, and almost gave up. But once I learned to water sparingly and pay attention to the cutting’s cues, everything changed. It’s not complicated. Wait for the callous. Mist lightly. Increase gradually. Watch for rot.
I still make mistakes. Last month, I left a clipping in direct sun while watering. It scorched. But now I know better. You will too. Just keep it simple. Your cactus clippings will thank you with strong roots and healthy growth.